Back to Blog
Testing guide
Best practices

How to Do Regression Testing: A Step-by-Step Guide

Learn how to do regression testing step by step, what to test, when to run it, which techniques to use, and how to keep your suite fast and reliable.

Armish Shah
June 29, 2026

Testing guide

How to Do Regression Testing: A Step-by-Step Guide

by:

Armish Shah

June 29, 2026

8

min

Share:

On this page

Ready to take your testing to
the next level?

Sleek and intuitive workflows
Transparent pricing
Easy migration

Introduction

Every time you ship a fix or merge a branch, you're changing code that used to work. Regression testing is how you confirm it still works. You retest the parts you didn't touch because software has a habit of breaking in places nobody expected. It's also where teams lose time. 

Test too little and a "small" change takes down checkout. Test everything every time, and your pipeline crawls while developers wait to merge a one-line fix. Getting it right is about running the right tests at the right moment, not running more of them.

This guide walks through it step by step: what regression testing is, when it kicks in, how to choose which tests to run, and what to automate versus what to leave alone.

What Is Regression Testing?

Regression testing is the practice of re-running existing test cases after a code change to confirm that everything that previously worked still does. The name comes from the bug it's designed to catch, a regression, where functionality that was fine yesterday quietly stops working today because of something you changed.

The keyword is existing. You're not writing new tests to check your new feature; that's a different job. You're re-running the tests you already have to make sure the new feature, bug fix, or dependency bump didn't break anything around it. A change to the payment module shouldn't break login, but code is interconnected in ways that aren't always visible, and a shared utility or an unexpected side effect can take down something three modules away.

That's the whole premise. Changes have a blast radius. Regression testing is how you measure that radius before your users are caught up in it.

Why Is Regression Testing Important?

The case for regression testing comes down to a single fact: the cost of a bug rises sharply the later you catch it. A regression caught in your pipeline costs a few minutes of compute. The same regression caught in production costs an incident, a rollback, a postmortem, and a dent in user trust. Regression testing moves the catch point left, to where fixing things is cheap.

  • It prevents cascading failures. The most dangerous bugs aren't in the code you changed. They're in the code you didn't. A change to a shared function can break three features that all depend on it, and without regression coverage, you won't find out until those features fail one by one. Re-running existing tests across the affected surface catches these knock-on breaks before they compound.
  • It protects release stability. Every release is a bet that the new build is at least as good as the old one. Regression testing is what makes that bet safe rather than hopeful. It gives you a consistent baseline. These things worked before. Confirm they still work so each release builds on solid ground instead of quietly accumulating breakage.
  • It enables confident, frequent deployment. Teams shipping daily or hourly can't manually verify the whole product on every merge. A reliable regression suite is what makes that pace possible: it's the automated safety net that lets developers merge and deploy without stopping to wonder what they might have broken. Without it, speed and stability become a trade-off. With it, you get both.
  • It reduces costly production bugs. Production incidents are expensive in ways that go beyond engineering time, lost revenue, support load, churn, and the slow erosion of confidence that follows visible failures. Catching regressions before release keeps those failures off your users' screens and out of your incident channel.

When Should You Run Regression Tests?

The short answer is: any time the code changes in a way that could affect existing behavior. In practice, that means a handful of specific triggers worth calling out, because each one carries its own kind of risk.

  • New features: Adding functionality means adding code that touches shared components, data models, and state that the rest of the app relies on. A new feature rarely lives in isolation, so its arrival is a prime moment for unintended side effects on everything around it.
  • Bug fixes: Fixes are deceptively risky. You're changing code precisely because it was already misbehaving, often under pressure, and a patch that resolves one issue can easily introduce another. Rerunning regression tests after a fix confirms you solved the problem without creating a new one.
  • Third-party integrations: Adding or upgrading an external dependency, API, or library brings in code you don't control. A version bump can change behavior in ways the release notes don't mention, so anything that consumes that dependency needs reverification.
  • Performance patches: Optimizations change how code runs, and that's exactly where subtle breakage hides. Refactoring for speed, adjusting caching, or reworking a query can alter outputs or edge-case behavior even when the intent was purely internal. Functional correctness has to be confirmed alongside the performance gain.
  • UI updates: Visual and front-end changes look low-risk, but frequently aren't. Reworking a component, restructuring a layout, or changing a form can break event handlers, validation, or downstream flows that depend on the old structure, often without any obvious visual cue that something snapped.
  • Pre-release builds: Regardless of what changed, the build heading for production should clear a full regression pass. This is the last checkpoint before users are involved, and it's where you confirm the accumulated changes of a release cycle haven't combined into something broken.

Types of Regression Testing

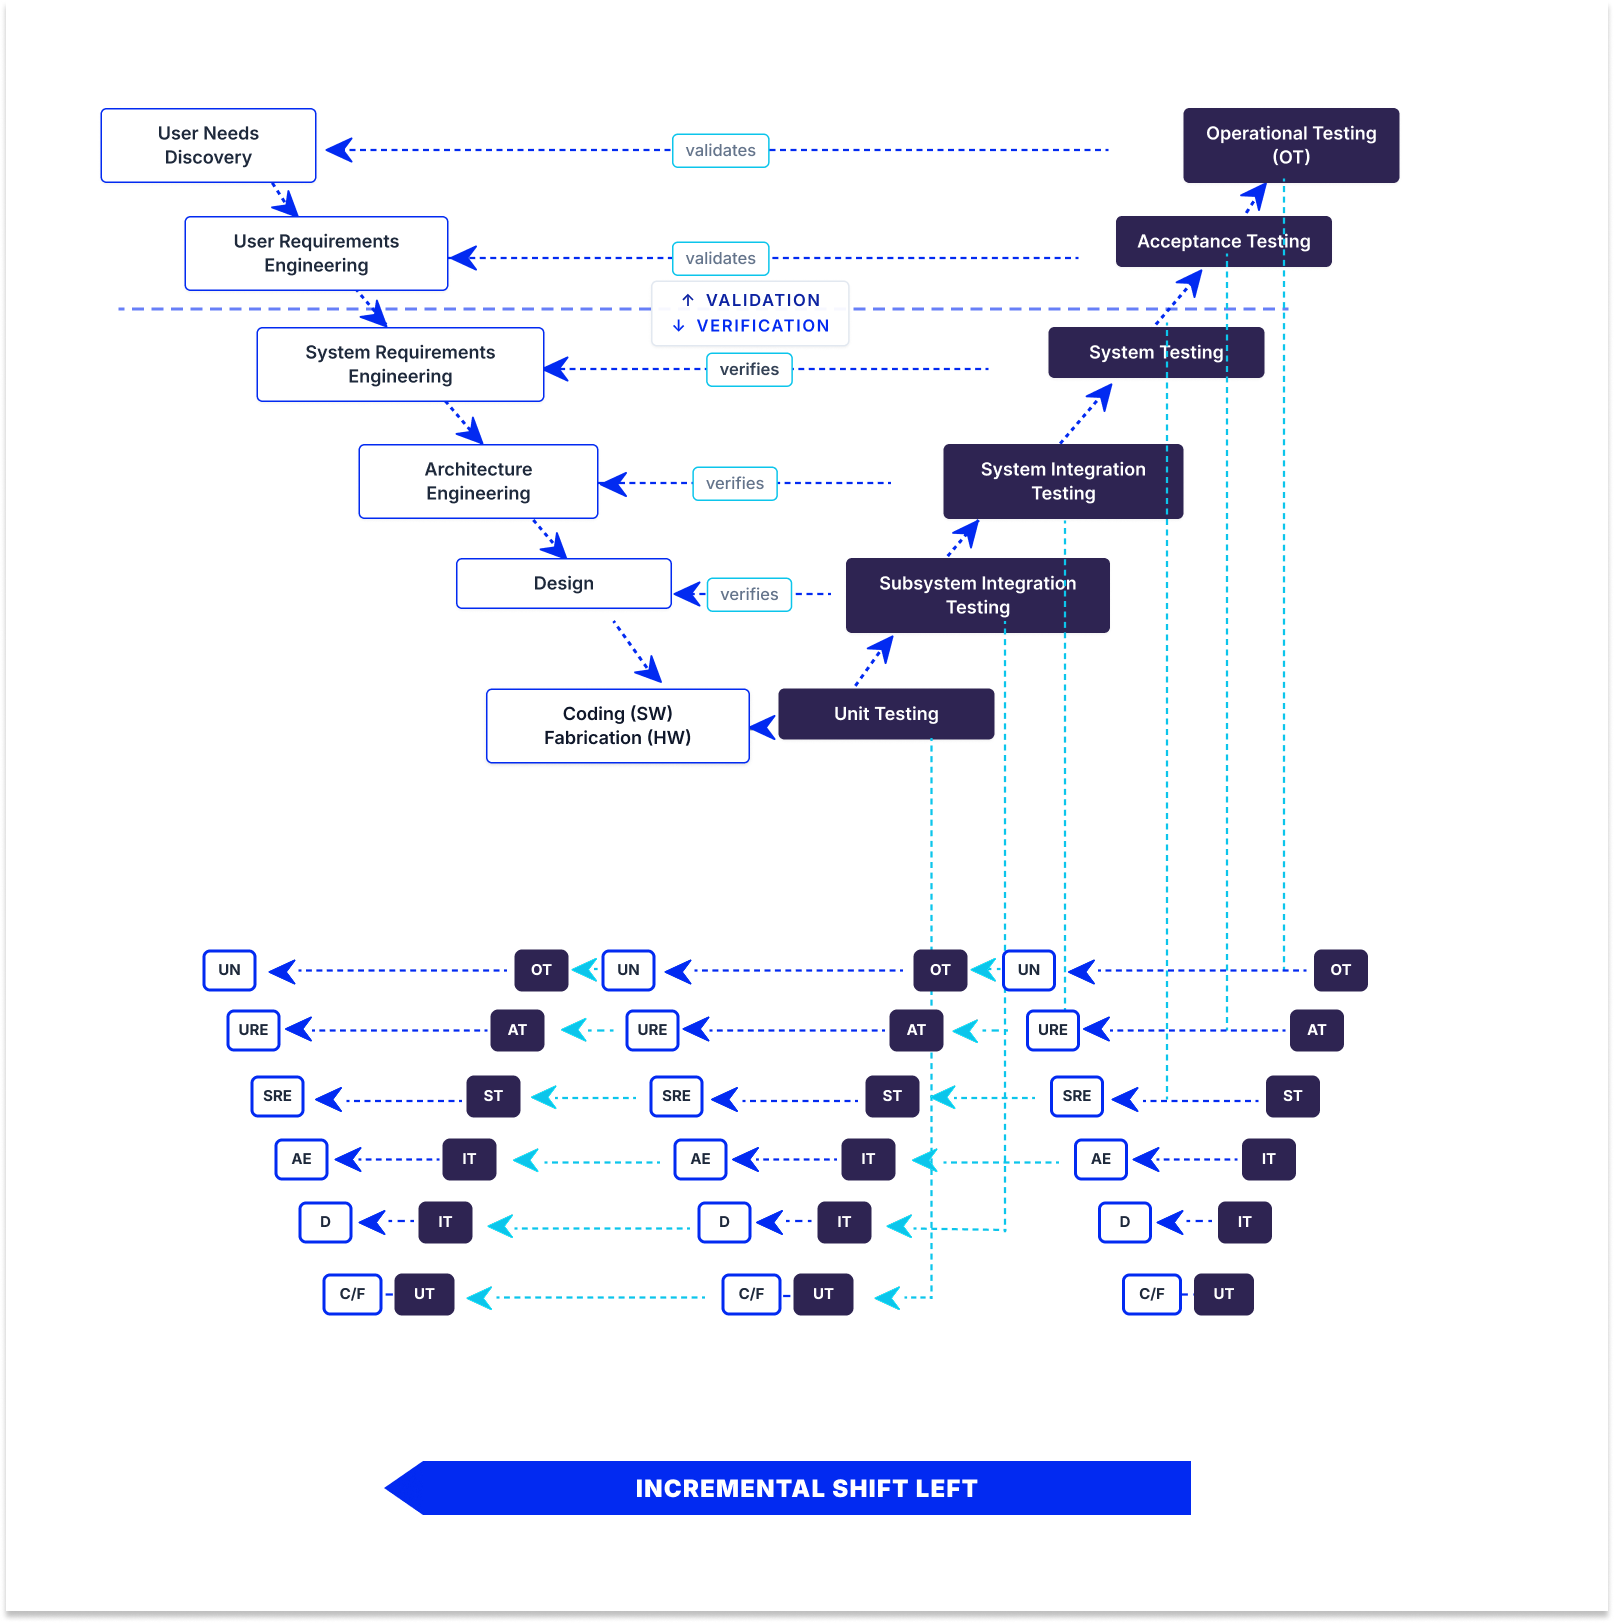
Not all regression testing operates at the same scope. Depending on what changed and how much risk it poses, teams reach for different approaches, from retesting a single isolated unit to rerunning the entire suite. 

Here are the main types and when each one makes sense:

Unit Regression Testing

The narrowest scope; you retest a single unit or module in isolation, deliberately ignoring its interactions with the rest of the system. Teams use it immediately after a small, contained code change when the goal is to confirm that one component still behaves correctly before worrying about anything downstream.

Partial Regression Testing

This retests the changed code along with the units that directly interact with it, rather than the whole application. It's the middle ground teams pick when a change is localized but not fully isolated. You want to verify the immediate neighborhood the change touches without paying for a full pass.

Regional Regression Testing

Here, you focus on the specific modules or "regions" affected by a change and the areas connected to them, identified through impact analysis. Teams use it when a modification has a known, bounded blast radius and they want to cover that radius thoroughly without testing unrelated parts of the system.

Complete / Full Regression Testing

The broadest scope, you rerun the entire test suite across the whole application. It's reserved for high-impact situations, major changes to core code, multiple overlapping modifications, dependency overhauls, or pre-release builds, where the risk justifies the time, and the only safe assumption is that anything could have broken.

Selective Regression Testing

This uses dependency analysis to run only the subset of test cases that touch the changed code, skipping the rest. Teams use it to keep cycles fast. Instead of re-running everything, you trace which tests are actually relevant to the change and execute just those.

Progressive Regression Testing

Used when the product specifications themselves have changed, this involves updating existing test cases (or writing new ones) to match the new requirements, then running them against the modified build. It fits situations where the expected behavior has legitimately shifted, and the old tests would otherwise produce false failures.

Corrective Regression Testing

Corrective regression testing is used when no changes have been made to the product's code or specifications. You re-run the existing test cases as is. Teams use it to reverify a stable build, for instance, confirming behavior on a new environment or after an external change, without needing to modify the suite at all.

Regression Testing Techniques

Knowing which tests to run, and in what order, is the core challenge of regression testing at scale. Rerunning everything is simple but slow. Running too little is fast but risky. These four techniques represent the main strategies teams use to navigate that trade-off.

Retest All

The most thorough and most expensive approach: rerun every test case in the suite, regardless of what changed. It leaves no gaps, which makes it the safest option on paper, but it's also the slowest and most resource-hungry, and that cost grows with every test you add. It should only be reserved for high-stakes moments like major releases or core architectural changes.

Regression Test Selection

Instead of running everything, you run a curated subset including the test cases relevant to the code that actually changed, identified through dependency or impact analysis. The suite effectively splits into tests worth rerunning for this change and tests that can be safely skipped. This cuts execution time substantially while still covering the affected area.

Test Case Prioritization

Here, the question isn't which tests to run but in what order. You rank test cases so the highest-value ones execute first, typically those covering critical business functionality, high-risk areas, recently changed code, or features with a history of breaking. The tests most likely to catch a serious regression run early, so a critical failure surfaces in the first few minutes rather than the last. 

Hybrid Approach

Most mature teams don't pick one technique. They combine selection and prioritization. You use dependency analysis to narrow the suite to the tests that matter for a given change, then prioritize that subset so the most critical cases run first. This gives you both speed and smart ordering, a smaller, well-sequenced run that delivers high-confidence feedback quickly. The hybrid approach is what most modern CI pipelines actually implement, because real-world constraints rarely reward a purist commitment to any single method.

How to Perform Regression Testing: Step by Step

Here's the entire regression testing process in a step-by-step guide, from the moment a change lands to the moment you're confident it's safe to ship.

Step 1: Identify What Changed and Map the Impact

Start with the change itself. Pull the difference and understand exactly what was modified,  which files, functions, modules, and dependencies. Then trace the blast radius: what depends on the changed code, what shares state with it, and which user-facing flows run through it. This impact analysis is the foundation for everything that follows, because it defines the area you actually need to cover. Skip it, and you're guessing, either testing too broadly and wasting time, or too narrowly and missing the knock-on break. Version control history, dependency graphs, and code coverage data all help here, as does input from the developer who made the change.

Step 2: Select and Prioritize Test Cases

With the impact mapped, decide which tests to run. Pull the existing cases that cover the affected area, then rank them, critical business paths and high-risk modules first, lower-risk peripheral checks later. For a small, contained change, this might be a focused subset. For a major one, it might be the full suite. The output of this step is a concrete, ordered run list. Be explicit about what's in and what's out, so coverage decisions are deliberate rather than accidental.

Step 3: Set Up the Test Environment

Regression results are only trustworthy if the environment is consistent. Set up test data, configurations, and dependencies to mirror production as closely as practical. Make sure the state is reset to a known baseline before each run. Inconsistent environments are the leading cause of flaky results. 

Step 4: Execute Tests (Manual, Automated, or Hybrid)

Run the selected cases. Stable, repetitive, high-value checks should be automated. They're the backbone of regression testing and the only way to keep pace with frequent releases. Reserve manual testing for areas where it genuinely adds value, such as exploratory checks, complex UI, and usability flows. 

Step 5: Analyze Results and Report Defects

A test run is only useful if you act on what it tells you. Triage the failures, and separate real regressions from environmental noise and flaky tests before raising anything. For genuine defects, log them with enough detail to reproduce the failing case, such as expected versus actual behavior, the change that likely caused it, and relevant logs or screenshots. Good defect reports shorten the fix cycle, whereas vague ones bounce back and forth and waste everyone's time. 

Step 6: Retest Fixes and Re-run the Suite

Once defects are fixed, the cycle repeats, but with more discipline. Verify each fix resolves the specific failure it targeted, then re-run the relevant regression tests to confirm the fix didn't introduce a new regression. This is the step teams most often cut short under deadline pressure, and it's exactly where fix-induced bugs slip through. For changes near critical functionality, widen the re-run beyond the immediate fix to catch any fresh side effects. Only when the affected suite passes cleanly is the change genuinely ready to ship.

Regression Testing vs. Retesting

These two terms get used interchangeably, but they describe different jobs, and confusing them leads to gaps in coverage. 

Retesting is narrow and targeted. A bug was reported, a developer fixed it, and you rerun the exact test case that originally failed, and it passes. In retesting, you already know what you're checking and why. 

Regression testing is broader and more skeptical. It reruns existing, previously passing tests across the surrounding area to catch unintended side effects you didn't anticipate. 

Common Challenges in Regression Testing (and How to Handle Them)

Most teams don't struggle with the concept of regression testing. They struggle with keeping it healthy as the product and the suite grow. Here are the five problems that surface most often, and what actually works against each:

Test suite bloat over time

Suites tend to grow and never shrink. Every feature adds tests, but old ones rarely get removed, and over time, you accumulate redundant cases, tests for deprecated features, and overlapping coverage that adds runtime without adding confidence. 

The fix is treating the suite as a maintained asset, not an archive: audit it on a regular cadence, remove tests for features that no longer exist, consolidate cases that check the same thing, and use code coverage data to find redundancy. 

High maintenance cost as the UI or logic evolves.

When the application changes, its tests have to change too, and brittle tests break constantly, turning every UI tweak into a round of test repair. The cost compounds until people start ignoring failures. 

The defense is writing resilient tests from the start: target stable selectors and identifiers rather than fragile ones like XPath tied to layout, build reusable components with patterns like the Page Object Model so a UI change updates in one place instead of fifty, and keep test logic separate from test data. 

Deciding what to include vs. exclude

If you run everything, it will take time. If you don’t run enough, you might miss regressions. Getting this balance right is genuinely hard, and guessing leads to both wasted cycles and blind spots. 

The answer is to make the decision data-driven rather than intuitive. Use impact analysis to map what a change actually affects, prioritize by business risk and failure history, and lean on test selection tied to code dependencies. 

Flaky tests that erode trust in results

A test that passes and fails on identical code is worse than no test at all. It trains the team to ignore failures, and a genuine regression hiding among the noise sails straight through. Flakiness usually traces back to timing issues, test interdependencies, unstable test data, or environment drift. 

Handle it aggressively. Quarantine flaky tests out of the main run so they stop blocking pipelines, fix the root cause, replace fixed waits with proper conditions, isolate tests so they don't depend on each other's state, and stabilize the environment. 

Time pressure in short sprint cycles

In fast sprints, full regression often won't fit in the window, and the temptation is to cut testing entirely, which is exactly when regressions slip through. 

The way out is speed through smart scoping, not skipping: prioritize critical-path tests so the most important coverage always runs, parallelize execution to compress runtime, and automate the repetitive bulk so humans focus on what needs judgment. 

How TestFiesta Simplifies Regression Testing

Most of the challenges above come down to the same root problem: regression testing generates a lot of moving parts, test cases, runs, failures, fixes, and releases. Keeping them organized across tools and sprints is where teams lose time. TestFiesta pulls those parts into one place.

Centralized regression suite management: Instead of test cases scattered across spreadsheets and folders, TestFiesta lets you organize your regression suite by module, risk level, and automation status. 

Traceability from test to defect to release: When a regression test fails, TestFiesta links it directly to the resulting bug report and tracks that defect through to closure, without switching between a test tool, a bug tracker, and a release dashboard. 

CI/CD pipeline integration: Automated regression results push into TestFiesta automatically, so every build carries a complete record of what was tested and how it turned out. This is what makes continuous regression testing practical rather than aspirational: the automated suite runs in your pipeline, the results land in one place, and you get a full coverage trail for every build without manual collation. 

Real-time dashboards and coverage reporting: Suite health is hard to manage when you can't see it. TestFiesta surfaces pass/fail trends, coverage gaps, and overall suite health across every release cycle from a single view. 

Ready to ship faster without breaking your production environment?

See how TestFiesta simplifies your regression testing with centralized suite management and seamless CI/CD integration.

Sign up for free today

Frequently Asked Questions

How often should regression tests be run?

Whenever code changes in a way that could affect existing behavior. In practice, that means continuously, scoped tests on every merge in CI, plus a fuller pass before each release. The trigger is the change, not the calendar. 

How do you choose which test cases to include in a regression suite?

Choose test cases to include in a regression suite based on impact and risk. Use impact analysis to map what a change affects, then prioritize by business risk and failure history so critical paths are covered first. 

What is automated regression testing?

Running regression cases through automation tools instead of by hand. Since regression testing re-runs the same stable, previously passing tests repeatedly, it's an ideal fit for automation. Machines handle the repetitive bulk faster and more consistently, freeing testers for exploratory work, complex UI flows, and newly changed functionality.

Is regression testing part of Agile and CI/CD?

Yes, regression testing is essential to both Agile and CI/CD. You can't ship daily while manually verifying the whole product each time. An automated regression suite runs on every build and confirms each change hasn't broken existing functionality, giving teams the confidence to merge and deploy fast without trading away stability.

Tool

Pricing

TestFiesta

Free user accounts available; $10 per active user per month for teams

TestRail

Professional: $40 per seat per month

Enterprise: $76 per seat per month (billed annually)

Xray

Free trial; Standard: $10 per month for the first 10 users (price increases after 10 users)

Advanced: $12 per month for the first 10 users (price increases after 10 users)

Zephyr

Free trial; Standard: ~$10 per month for first 10 users (price increases after 10 users)

Advanced: ~$15 per month for the first 10 users (price increases after 10 users)

qTest

14‑day free trial; pricing requires demo & quote (no transparent pricing)

Qase

Free: $0/user/month (up to 3 users)

Startup: $24/user/month

Business: $30/user/month

Enterprise: custom pricing

TestMo

Team: $99/month for 10 users

Business: $329/month for 25 users

Enterprise: $549/month for 25 users

BrowserStack Test Management

Free plan available

Team: $149/month for 5 users

Team Pro: $249/month for 5 users

Team Ultimate: Contact sales

TestFLO

Annual subscription (specific amounts per user band), e.g., Up to 50 users: $1,186/yr; Up to 100 users: $2,767/yr; etc.

QA Touch

Free: $0 (very limited)

Startup: $5/user/month

Professional: $7/user/month

TestMonitor

Starter: $13/user/month

Professional: $20/user/month

Custom: custom pricing

Azure Test Plans

Pricing tied to Azure DevOps services (no specific rate given)

QMetry

14‑day free trial; custom quote pricing

PractiTest

Team: $54/user/month (minimum 5 users)

Corporate: custom pricing

Black Box Testing

White Box Testing

Coding Knowledge

No code knowledge needed

Requires understanding of code and internal structure

Focus

QA testers, end users, domain experts

Developers, technical testers

Performed By

High-level and strategic, outlining approach and objectives.

Detailed and specific, providing step-by-step instructions for execution.

Coverage

Functional coverage based on requirements

Code coverage

Defects type found

Functional issues, usability problems, interface defects

Logic errors, code inefficiencies, security vulnerabilities

Limitations

Cannot test internal logic or code paths

Time-consuming, requires technical expertise

Aspect

Test Plan

Test Case

Purpose

Defines the overall testing strategy, scope, and approach for a project or release.

Validates that a specific feature or functionality works as expected.

Scope

Covers the entire testing effort, including what will be tested, resources, timelines, and risks.

Focuses on a single scenario or functionality in the broader scope.

Level of Detail

High-level and strategic, outlining approach and objectives.

Detailed and specific, providing step-by-step instructions for execution.

Audience

Project managers, stakeholders, QA leads, and development teams.

QA testers and engineers.

When It's Created

Early in the project, before testing begins.

After the test plan is defined and the requirements are clear.

Content

Scope, objectives, strategy, resources, schedule, environment details, and risk management.

Test case ID, title, preconditions, test steps, expected results, and test data.

Frequency of Updates

Updated periodically as project scope or strategy changes.

Updated frequently as features change or bugs are fixed.

Outcome

Provides direction and clarifies what to test and how to approach it.

Produces pass or fail results that indicate whether specific functionality works correctly.

Tool

Key Highlights

Automation Support

Team Size

Pricing

Ideal For

TestFiesta

Flexible workflows, tags, custom fields, and AI copilot

Yes (integrations + API)

Small → Large

Free solo; $10/active user/mo

Flexible QA teams, budget‑friendly

TestRail

Structured test plans, strong analytics

Yes (wide integrations)

Mid → Large

~$40–$74/user/mo)

Medium/large QA teams

Xray

Jira‑native, manual/
automated/
BDD

Yes (CI/CD + Jira)

Small → Large

Starts ~$10/mo for 10 Jira users

Jira‑centric QA teams

Zephyr

Jira test execution & tracking

Yes

Small → Large

~$10/user/mo (Squad)

Agile Jira teams

qTest

Enterprise analytics, traceability

Yes (40+ integrations)

Mid → Large

Custom pricing

Large/distributed QA

Qase

Clean UI, automation integrations

Yes

Small → Mid

Free up to 3 users; ~$24/user/mo

Small–mid QA teams

TestMo

Unified manual + automated tests

Yes

Small → Mid

~$99/mo for 10 users

Agile cross‑functional QA

BrowserStack Test Management

AI test generation + reporting

Yes

Small → Enterprise

Free tier; starts ~$149/mo/5 users

Teams with automation + real device testing

TestFLO

Jira add‑on test planning

Yes (via Jira)

Mid → Large

Annual subscription starts at $1,100

Jira & enterprise teams

QA Touch

Built‑in bug tracking

Yes

Small → Mid

~$5–$7/user/mo

Budget-conscious teams

TestMonitor

Simple test/run management

Yes

Small → Mid

~$13–$20/user/mo

Basic QA teams

Azure Test Plans

Manual & exploratory testing

Yes (Azure DevOps)

Mid → Large

Depends on the Azure DevOps plan

Microsoft ecosystem teams

QMetry

Advanced traceability & compliance

Yes

Mid → Large

Not transparent (quote)

Large regulated QA

PractiTest

End‑to‑end traceability + dashboards

Yes

Mid → Large

~$54+/user/mo

Visibility & control focused QA

Related Articles

Introduction

Software delivery shouldn’t feel like a high-stakes guessing game. Yet, for many teams, the journey from “code complete” to “production ready” is challenging and hinges on manual processes prone to human error and bottlenecked by outdated documentation. CI/CD pipeline automates this process with faster release cycles, earlier bug detection, and reduced human error. This guide strips away the jargon to explain what a CI/CD pipeline actually does, why it’s the only way to scale, and how you can audit your current setup.

What Is a CI/CD Pipeline

A CI/CD (Continuous Integration and Continuous Delivery/Deployment) pipeline is the automated sequence of steps that moves a code change from a developer’s side to running software in production. A CI/CD pipeline builds it, tests it, scans it, packages it, and deploys it automatically, on every change, in the same order, every time.

The CI, Continuous Integration, gives you confidence the change is safe: the code compiles, the tests pass, and security scans come back clean. The CD delivers the result, either to a state where it’s ready to deploy (Continuous Delivery) or all the way to production automatically (Continuous Deployment).

Continuous Integration vs. Continuous Delivery vs. Continuous Deployment

Although almost always used in combination with each other, all Continuous Integration, Continuous Delivery, and Continuous Deployment have different meanings. 

Continuous Integration (CI): In CI, every code change is automatically built and tested against the shared branch. The goal is fast feedback: if your change breaks something, you find out in minutes. The key practice is frequency. Small changes merged often beat large changes merged rarely, because small changes are easier to review, easier to revert, and far less likely to conflict with someone else’s work.

Continuous Delivery (CD): In Continuous Delivery, every change that passes CI is automatically packaged into an artifact that could go to production at any time. A human still decides when to push the button. The goal is keeping the codebase permanently deployable, so a release becomes a business decision instead of a technical event. For teams with compliance requirements or fixed release windows, this is usually the practical end state.

Continuous Deployment (CD): In Continuous Deployment, every change that passes the full pipeline ships to production automatically, with no human approval gate. The goal is eliminating release ceremonies entirely. This takes more than technical maturity. It requires high test confidence, strong observability, fast rollback, and organizational trust in the pipeline itself.

The 8 Stages of a CI/CD Pipeline

A pipeline is a quality gauntlet. Code has to survive every stage before it reaches production, and if any stage fails, the pipeline stops immediately, and the developer gets notified. 

Stage 1: Commit

The Commit stage is the beginning of the CI/CD lifecycle. It kicks off when developers push code from their local environments into a shared version control system, such as Git. During this phase, you can run pre-commit scripts, like linters, syntax checkers, or security scans, to identify basic issues before integration. 

Stage 2: Source

Everything starts at the source, be it a git push, a pull request, or a merge to main, which fires a webhook that kicks off the pipeline. The source stage checks out the code, validates branch rules, and sets up environment variables for everything downstream.

Stage 3: Build

In the build stage, the focus shifts to transforming source code into ready-to-use artifacts like binaries, libraries, or container images. This process handles code compilation, dependency resolution, and application packaging, such as creating .jar files for Java or building Docker images. Beyond assembly, the build phase verifies code quality by checking for syntax errors, maintaining consistent formatting, and scanning for security vulnerabilities in dependencies. 

Stage 4: Test

Tests run in order from fastest to slowest. Unit tests go first: milliseconds each, pure functions, no I/O. Integration tests come second, touching real databases, real queues, real HTTP. End-to-end tests run last, walking full user journeys through a testing pyramid. E2E tests are slow and expensive, which is exactly why they run at the end.

The fail-fast principle does the heavy lifting here. If 847 unit tests fail in 45 seconds, the 30-minute E2E suite never runs, and nobody’s time or compute gets wasted on a change that was already broken.

Stage 5: Security

Security means four checks: SAST (static code analysis) on every pull request, dependency scanning on every build, container image scanning before any environment promotion, and secrets scanning to catch a token someone accidentally committed. The economics are hard to argue with. A vulnerable dependency flagged in CI is a version bump and a re-run. The same vulnerability discovered after deployment means emergency patching, customer notification, and, depending on your industry, regulatory reporting.

Stage 6: Artifact

This stage involves packaging the verified, security-scanned output into an immutable artifact. Usually, that’s a container image tagged with the exact commit SHA, pushed to a central registry. From this point on, that same artifact gets promoted through staging and production without ever being rebuilt.

Stage 7: Staging

In this stage, developers deploy the artifact to a test environment that mirrors production as closely as you can manage, which is staging. Then run three kinds of checks: smoke tests confirming critical endpoints respond, acceptance tests covering 10 to 20 key user journeys, and a performance check against a baseline your team has defined, such as flagging any response time that drifts well past what production normally serves.

Stage 8: Production and Deployment 

In the last stage, the artifact moves from staging to production using a zero-downtime strategy. Rolling deployments update instances gradually. Blue/green runs two environments and switches traffic between them, which makes rollback nearly instant. Canary testing sends a small slice of traffic, often 1 to 5 percent, to the new version first, then expands in phases as the metrics hold.

CI/CD Pipeline Failure Modes to Watch Out for

CI/CD pipelines can degrade over time, that too silently. Here’s what to look out for:

  • Pipeline drift. Stages add tests. Tests add fixtures. Fixtures add I/O. Each individual change is small and defensible, but the aggregate effect over a year of normal product work is that pull request (PR) feedback time doubles. Without a metric on pipeline duration, the slowdown is invisible until CI starts taking forever. The fix: Track pipeline duration as a first-class metric alongside your DORA metrics, and alert when median PR check time crosses 10 minutes. 
  • Flaky test tolerance. A flaky test is a test that fails on one run and passes on another. It teaches engineers exactly one behavior: click “rerun.” Once that habit forms, real failures go through the rerun reflex first, and the pipeline’s signal degrades into noise. The fix is to detect flakes systematically and quarantine them out of required checks until they’re actually fixed. 
  • Configuration aging. Pipeline YAML ages badly. Versions get pinned, then drift, then break when something upstream changes. Security patches lag. Cache invalidation logic falls behind the build graph. None of this shows up as a failing pipeline today. It shows up as a 90-minute incident at critical times. The fix: Treat the pipeline file as production code. Review it, version it, monitor it. A pipeline config that hasn’t been reviewed in six months probably has a few silent problems in it right now.

TestFiesta Plugs the Gap Your Pipeline Leaves Open

A CI/CD pipeline automates the path from commit to production, but it only ever runs the tests that exist. It can’t tell you which critical paths have never been tested, which test cases are missing coverage, or whether the tests that are passing actually validate the right behavior.

That gap between tests passed and the right things being tested is exactly where TestFiesta lives. It’s the test management layer that gives your team visibility into what the pipeline is actually validating: structured test case management, coverage tracking across pipeline runs, and an audit trail that turns a green checkmark into a statement your team can stand behind.

Ready to bridge the gap between passing tests and actual quality?

Stop guessing if your pipeline is validating the right things. Get full visibility into your coverage with TestFiesta and build an audit trail you can stand behind.

Start Your Free Trial

FAQs

What’s the difference between a CI/CD pipeline and DevOps?

DevOps is the culture: development and operations working as one team with shared ownership of delivery. CI/CD is the technical implementation of one of its core practices, automating the path from commit to production. 

Which CI/CD tools should I use?

To pick the right CI/CD tool, start with where your code lives. GitHub Actions is the lowest-friction choice on GitHub, and GitLab CI/CD is the strongest all-in-one option on GitLab. Jenkins is highly configurable but carries real maintenance overhead, while CircleCI and Buildkite suit teams that need performance at scale. 

How long should a CI/CD pipeline take?

The duration of a CI/CD pipeline depends on the stage. PR checks (build, lint, unit tests) should finish in under 10 minutes, since anything slower forces engineers to switch contexts. Merge-time checks like integration tests and security scans can run up to 30 minutes, and staging deployment plus verification should stay under 15. For most web applications, merge to production should take under an hour end to end. 

Testing guide
Best practices

Introduction

A race condition is a bug where the outcome of your code depends on timing you don’t control. In a race condition, two operations overlap, each one correct on its own, and together they corrupt the data, such as an inventory count, double-charging a customer, or handing an attacker root access. These outcomes can pass code review, survive 100% test coverage, and only show up under real concurrent traffic. This guide breaks down how race conditions work, why your existing pipeline can’t catch them, and how to fix them at the layer where they actually live.

What Is a Race Condition in Software?

A race condition occurs when a program’s behavior depends on the sequence or timing of events it doesn’t control, and at least one possible ordering produces a wrong result. The code assumes it’s the only thing running, which is false in the real world.

The classic example: two users see one item in stock. Both requests read stock = 1. Both pass the if stock > 0 check. Both decrement. Final stock: -1. Neither request saw the other’s write, because both reads happened before either write committed.

Nothing in that code is broken in isolation. Run it once, it works every time. Run two copies at the same moment, and it fails, not occasionally but reliably, whenever the timing lines up. That’s the defining trait of a race condition, correctness that depends on an ordering nobody guaranteed.

Race Condition vs. Data Race: A Distinction That Actually Matters

Most guides use these terms interchangeably, but they’re not the same thing, and the confusion causes real problems in code reviews and security triage.

Data race: A formally defined term. Two threads access the same memory location at the same time, at least one access is a write, and no synchronization sits between them. The C11 and C++11 memory models define this as undefined behavior. Data races are mechanical enough that tools can catch them: ThreadSanitizer and Go's -race flag detect them reliably at runtime.

Race condition: A semantic error. The program produces the wrong result because of the timing or ordering of events, whether or not a data race is present. No tool can detect this class in general, because detecting it requires knowing what the code is supposed to do.

So when a tool reports “no data races found,” that is not a clean bill of health. It means one specific, narrow class of concurrency bug is absent. The inventory oversell above can happen in code with no data races at all, because the race window sits in the database, not in memory.

The Two Race Condition Patterns Behind Most Production Incidents

Most production incidents caused by concurrency stem from two primary race condition patterns:

1. Check-Then-Act

The pattern: read a value, make a decision based on it, then act, assuming the value hasn’t changed between the read and the action. In a concurrent system, that assumption fails whenever there’s a gap between the check and the act. And there’s always a gap.

Three scenarios that show up in incident reports constantly:

  • Inventory oversell. Read stock = 1, gap, decrement. Two concurrent requests both read 1, both pass the check, both decrement. Final stock: -1. The fulfillment team ships an order that can't be filled.
  • Coupon abuse. Read coupon_used = false, gap, mark used. A user fires 50 simultaneous requests at the redemption endpoint. 47 of them pass the check before any write commits. One promo code, applied 47 times. Finance notices at month-end close.
  • Double-spend. Read balance = $100, gap, deduct $100. Two simultaneous transfer requests both see $100, both pass, both deduct. $200 leaves a $100 account. Discovered in reconciliation, not prevented at the source.

The rule worth internalizing: Any SELECT followed by a conditional UPDATE in separate statements is a check-then-act. In a concurrent system, it is vulnerable by construction. 

2. Read-Modify-Write

Read-Modify-Write (RMW) is a sequence of three operations performed on shared data:

  1. Read the current value from memory.
  2. Modify that value (e.g., increment, decrement, update).
  3. Write the new value back to memory.

The problem is that these three steps are not atomic (they don’t happen as a single indivisible operation). If multiple threads execute them simultaneously, a race condition can occur. 

An example:

Incrementing a Counter: Suppose two threads share a variable counter = 5. Both threads execute counter = counter + 1;. Internally, this becomes:

Step Thread A Thread B
Read Reads 5 Reads 5
Modify Calculates 6 Calculates 6
Write Writes 6 Writes 6

Expected result: 7

Actual result: 6

One increment is lost because both threads read the same original value before either wrote back the update. This is called a lost update, one of the most common race conditions.

Why Race Conditions Are Not Detected in Your Pipeline

Race conditions slip through the cracks because every standard quality gate tests a dimension these bugs don’t live in.

They're nondeterministic by nature. The same code path produces different results depending on thread scheduling, which the OS controls, not you. The bug disappears when you rerun the test. It disappears when you add a log line, because logging adds latency and latency changes the timing. It disappears in debug mode.

Sequential testing is structurally blind to them. Unit tests, functional tests, and manual QA all exercise one operation at a time. Race conditions only exist when two operations overlap. You can have 100% test coverage and 0% race condition coverage at the same time. The tests aren’t wrong. They’re measuring the wrong dimension.

Static analysis mostly can’t reason about them. SAST tools catch SQL injection and XSS because those have detectable syntactic patterns. Race conditions require reasoning about timing across concurrent executions, which static analysis can’t do in the general case. The code looks correct in isolation. It just isn’t correct when two copies run at once.

Code review catches operations, not interactions. A race condition lives in the gap between two correct operations. Each operation, reviewed on its own, passes. The bug only exists in the overlap. A reviewer who approves both operations individually has done their job correctly and still shipped the vulnerability.

How to Fix a Race Condition

There’s no single universal fix. The right approach depends on where the race window lives and what your system looks like. Here are a few fixes ordered by reliability:

1. Atomic database operations: Collapse the check and the act into a single statement. UPDATE inventory SET qty = qty - 1 WHERE id = 1 AND qty > 0 is atomic; the database guarantees no concurrent transaction slips between the condition and the write. Check the affected row count. Zero rows means the condition failed, and you return “out of stock” instead of overselling. No application-level coordination required. For web application race conditions, this is the highest-reliability fix available.

2. SELECT FOR UPDATE (pessimistic locking). When the operation is too complex for a single atomic statement, lock the row at read time. No concurrent transaction can modify that row until the lock releases. Reliable for single-database architectures, at the cost of latency under high contention. For financial and inventory operations, also raise the isolation level to REPEATABLE READ or SERIALIZABLE. Several major databases default to READ COMMITTED, which permits non-repeatable reads, the root cause of most web application race conditions.

3. Optimistic locking with a version column. Add a version integer to the table. Read it with the data, then include it in the update: UPDATE ... WHERE id = 1 AND version = 5. Zero rows affected means another transaction got there first, so you retry or return a conflict. No lock held, conflict detected at write time. Best for low-contention workloads where retries are acceptable.

4. Idempotency keys. For operations a client might retry (payments, transfers, webhook delivery), require a unique key per logical request. Store it on first processing and return the cached result for duplicates. This prevents duplicate processing regardless of race timing or retry behavior.

5. Queue-based serialization. For high-throughput scenarios, route updates through a message queue with a single consumer per logical item. Serial processing eliminates the race window entirely. Pair it with idempotency keys at the consumer, since most queues deliver at-least-once.

6. Database constraints as the last line of defense. Unique constraints, check constraints like qty >= 0, and foreign keys don't prevent race conditions. What they do is turn silent data corruption into a hard database error you'll see in your logs. Add them anyway, always. They’re the crash net, not the tightrope.

5 Questions to Find Race Conditions in Your Own Codebase Right Now

You don’t need a formal audit to start. These five questions will surface most of the exposure:

  1. Is there a check-then-act pattern? Any SELECT followed by a conditional UPDATE in separate statements is a candidate. Mentally execute it twice simultaneously with the same input. If the second execution can see the state before the first one commits, you have a race window.
  2. What happens if this endpoint receives 50 identical requests in 100ms? The cheap version: open two browser tabs and hit the same “redeem” or “purchase” button at the same time. For financial or inventory endpoints, run a proper concurrent load test before shipping, not after a user reports the bug.
  3. Does any counter, balance, quantity, or boolean flag get read before it’s written? These are the highest-value targets. If the read and the write aren’t in the same atomic operation, they’re vulnerable under concurrent load.
  4. Are uniqueness constraints enforced at the database layer? Application-level checks like if email not in database: insert are always raceable. A unique constraint at the database layer is not. If your uniqueness guarantee lives only in application code, move it down a layer.
  5. Do any privileged processes check a file path before using it? Any exists() then open(), or access() then fopen(), in a process with elevated privileges is a potential TOCTOU (Time of Check to Time of Use). Drop the check and handle the exception from the operation itself.

TestFiesta Makes Test Management Easy So You Ship Quality Software

Everything above points at one structural fact: race conditions survive standard test suites not because the tests are bad, but because sequential test execution is the wrong instrument for a concurrency problem. A suite that runs one operation at a time cannot, by definition, exercise the overlap where these bugs live.

TestFiesta closes that gap at the test management layer. Structured concurrent test execution, test case tracking across parallel runs, and coverage visibility that shows your team exactly which critical paths have never been tested under concurrent load. Because you can’t fix what you haven’t measured, and you can’t measure race condition exposure with a suite built to run one thing at a time.

If your tests aren’t simulating concurrency, they aren’t testing your system’s actual behavior.

Don’t wait for a race condition to show up in your logs. Identify, test, and resolve concurrent vulnerabilities today.

Start Your Free Trial

FAQs

Is a race condition always a security vulnerability?

Not always. In business logic (inventory, balances, coupons), it’s a data integrity bug with financial consequences. In security-sensitive paths like permission checks or privileged file operations, it becomes exploitable, so what the race window touches determines which one you have.

Do race conditions only happen in multi-threaded applications?

No. The most common race conditions in web applications happen between separate HTTP requests hitting the same endpoint at once, with no threads involved. Even single-threaded Node.js creates race windows through async/await, and serverless handlers running in parallel are especially prone.

Can automated tools reliably detect race conditions?

Only partially. ThreadSanitizer and Go's -race flag catch data races reliably, but not semantic race conditions where the logic is wrong despite synchronized memory access. The most reliable detection is deliberate concurrent testing: fire dozens of simultaneous requests at sensitive endpoints and watch for constraint violations in production logs.

Testing guide

Introduction

Most test suites don't fail because testers lack skill. They fail because nobody designed them. Teams write test cases reactively, one scenario at a time, as features ship and bugs surface. Six months later, the suite has 2,000 test cases, half of them overlap, entire risk areas have zero coverage, and nobody can tell you which tests actually matter. The problem isn't effort. It's the absence of a design step before the writing step.

This guide covers what test case design actually is, the three approaches that frame it, the six techniques that do most of the heavy lifting, and how to pick between them without turning your test plan into a theory exercise.

What Is Test Case Design

Test case design is the systematic process of deciding which scenarios to test before you write a single test case. It answers three questions upfront: what inputs and conditions matter, which combinations are worth covering, and where defects are most likely to hide.

Think of it as strategy, not documentation. A designed suite starts from the question "what could break, and how do we prove it doesn't?" An undesigned suite starts from "what did we build, and can we click through it?" The first approach produces a small set of high-value tests. The second produces a large set of tests that mostly confirm the happy path works, which you already knew.

Design happens at the level of the feature or system, not the individual test. You partition the input space, map the states, identify the boundaries, and only then translate that analysis into concrete test cases.

Test Case Design Is Different Than Test Case Writing

Test case writing is documentation: preconditions, steps, expected results, test data. It's the execution artifact. Writing a test case well means someone else can run it and get the same result.

Test case design is the analysis that decides which test cases deserve to exist. It happens before writing and determines the shape of the whole suite.

Here's the practical difference. A writer given a login form produces "enter valid credentials, click submit, verify dashboard loads." A designer given the same form first asks: what are the input classes for username and password? What are the length boundaries? What states can the account be in (active, locked, expired, unverified)? What happens on the fifth failed attempt? The designer ends up with maybe twelve test cases. The writer ends up with three, and the missing nine are exactly where the defects live, which is not the ideal scenario.

The Three Test Case Design Approaches

Every design technique falls under one of three approaches. Each answers the question "what do I know about the system?" differently, and the answer determines what kind of tests you can produce.

Black Box Design

You design tests from requirements and specifications without looking at the code. The system is a box: you control inputs, observe outputs, and verify behavior matches what was promised.

Black box design mirrors how users experience the software, which makes it the natural fit for functional testing, acceptance testing, and any scenario where "does it meet the spec?" is the question. Its blind spot is internal logic. Two code paths that produce the same output look identical from outside, so untested branches can hide behind passing tests.

White Box Design

You design tests from the code structure itself. Coverage is measured in code terms: statement coverage (every line executes at least once), branch coverage (every decision point takes both outcomes), and path coverage (every distinct route through the logic gets exercised).

White box design catches what black box can't: dead code, unreachable branches, logic errors in conditions that happen to produce correct output for the inputs you tried. Its blind spot is the inverse. Code can be fully covered and still do the wrong thing, because coverage measures execution, not correctness against requirements.

Experience-Based Design

You design tests from what you know tends to break. Past defect reports, domain knowledge, familiarity with how this team's code fails: all of it feeds scenarios that neither the spec nor the code structure would suggest.

This approach exists because specs are incomplete and code review misses things. A tester who has watched three payment integrations fail on currency rounding will test currency rounding, even when the spec says nothing about it and the code looks clean. Experience-based design is the least systematic of the three, which is both its strength and its risk: it finds defects formal methods miss, but its coverage depends entirely on who's doing the designing.

The 6 Core Test Case Design Techniques

Techniques are where approaches become concrete. There are dozens in the textbooks. These six cover the vast majority of real-world design work.

Equivalence Partitioning

Divide the input domain into classes where every value should behave identically, then test one representative from each class instead of every possible value.

Take an age field that accepts 18 to 65. There are three partitions: below 18 (invalid), 18 to 65 (valid), above 65 (invalid). Testing age 25, 30, and 40 tells you nothing that testing 25 alone didn't. Testing 25, 10, and 70 covers all three classes with three tests.

The technique works because software processes classes of input through the same logic. If the code handles 25 correctly, it almost certainly handles 30 correctly, because it's the same branch. Partitioning turns an infinite input space into a small, finite set of representatives. It's usually the first technique applied to any input field and the foundation the next technique builds on.

Boundary Value Analysis

Test at the edges of your partitions, because that's where defects cluster. For the 18 to 65 age field, the boundary values are 17, 18, 65, and 66: the minimum, the maximum, and the values immediately outside each.

The reason this works is mundane: developers write > when they meant >=, or set a loop to run one iteration short. Off-by-one errors are among the most common defects in software, and they live exclusively at boundaries. A test at age 40 will never catch a condition written as age > 18 instead of age >= 18. A test at exactly 18 catches it immediately.

Boundary value analysis pairs with equivalence partitioning by default. Partitioning tells you where the classes are; boundary analysis tells you to test their edges rather than their middles.

Decision Table Testing

When business logic depends on combinations of conditions, map every combination to its expected result in a table, then derive one test per column.

Consider a discount rule: members get 10% off, orders over $100 get free shipping, and first-time buyers get a welcome coupon. Three conditions, eight combinations. Without a table, teams reliably test the obvious cases (member with a big order) and miss the odd ones (non-member, first purchase, exactly $100). The table makes gaps visible: every combination either has a test, or it visibly doesn't.

Decision tables shine when requirements are written as prose rules scattered across a document. Building the table often exposes contradictions and undefined combinations in the requirements themselves, before any code gets tested.

State Transition Testing

Some systems aren't defined by inputs and outputs but by states and the events that move between them. An order goes from placed to paid to shipped to delivered. A user account goes from unverified to active to locked. State transition testing maps the states, the valid transitions, and, critically, the invalid ones.

The valid paths are easy, and everyone tests them. The value is in the invalid transitions: what happens when a cancel request arrives for an already-shipped order? When a payment webhook fires twice? When a user tries to log in to a locked account? Systems that handle valid sequences perfectly can fall apart on out-of-order events, and state transition testing is the only technique that systematically finds those cases.

Draw the state diagram first. If you can't draw it, the requirements have a gap, and you found it before writing a single test.

Pairwise Testing

When parameters multiply, exhaustive testing dies fast. Four browsers, three operating systems, five screen sizes, and two account types produce 120 combinations. Add a language dimension, and you're past 500.

Pairwise testing cuts the count by relying on an empirical observation: most defects involve the interaction of just two parameters, not three or four acting together. Instead of every combination, you test a set where every pair of parameter values appears together at least once. That 120-combination matrix typically collapses to around 20 tests while still covering every two-way interaction.

You don't build pairwise sets by hand; tools like PICT generate them. Your job as the designer is deciding which parameters matter and flagging any specific combinations that are known to be high-risk, which get added explicitly on top of the generated set.

Error Guessing

The formal techniques above are systematic, which means they share a weakness: they only find what the system model predicts. Error guessing fills the gap with informed intuition about what actually breaks software.

Experienced testers carry a mental checklist: null and empty values, special characters and emoji in text fields, pasted input instead of typed, double-clicking submit buttons, hitting back mid-transaction, uploading a 2GB file where a photo was expected, network drops during a save. None of these come from a spec or a coverage metric. They come from having watched them break things before.

Error guessing shouldn't be your only technique, because its coverage is unmeasurable. It should always be your last technique, applied after the systematic ones, because it catches the category of defect they structurally cannot.

How to Choose the Right Technique

Match the technique to what the system in front of you looks like:

Input fields with ranges or formats require equivalence partitioning and boundary value analysis. This combination handles most form validation, API parameter checks, and configuration inputs.

Business rules with multiple interacting conditions demand decision table testing. Examples include pricing engines, eligibility checks, permission systems, anything with "if X and Y but not Z."

Workflows and status-driven behavior call for state transition testing. These include checkout flows, approval chains, document lifecycles, and session management.

Large configuration matrices require pairwise testing. Examples include cross-browser and cross-device coverage, feature flag combinations, and environment permutations.

Known fragile areas or thin specifications are tested by error guessing, the right tools when you inherit a system with a defect history, and without proper documentation.

Critical logic that must be provably exercised should be tested with white box techniques including statement and branch coverage. Examples include payment calculations, security checks, anything where an untested branch is unacceptable.

Test Case Design Strategies That Scale

Good technique selection makes a suite comprehensive at launch. These four strategies keep it maintainable at year three, which is a different and harder problem.

Single-Purpose Test Cases

Each test case should verify or validate exactly one thing. A test named "verify login, profile update, and logout" is three tests wearing one ID, and when it fails, the failure tells you almost nothing. Which of the three broke? Someone has to rerun and investigate before debugging even starts.

Single-purpose tests make failures self-explanatory. "Verify login rejects expired password" fails, and you know precisely what to look at. The suite gets longer in test count but dramatically shorter in diagnosis time, and diagnosis time is where teams actually bleed hours.

Test Independence

Every test should run in any order, from a clean starting point, without depending on state left behind by a previous test. Chained tests, where test 14 only passes if tests 12 and 13 ran first, create two problems: one failure cascades into dozens of false failures, and the suite can never be parallelized.

Independence has a cost: each test must set up its own preconditions, which means more setup logic and shared fixtures. Parallel execution alone typically repays the investment, and the elimination of cascade failures repays it again every time someone doesn't spend an afternoon chasing twelve red tests caused by one real defect.

Reusable Test Components

As suites grow, the same steps appear everywhere: log in, create a test record, navigate to a module. If those steps are copy-pasted into 200 test cases, then a change to the login flow means editing 200 test cases, and in practice, it means editing 150 of them and shipping 50 broken tests.

Structure shared steps and shared test data as central components that individual test cases reference. Update the component once, and the change propagates. This is the single biggest determinant of whether a suite's maintenance cost grows linearly or explodes with size.

Risk-Based Prioritization

Not all functionality deserves equal design effort, because not all failures cost the same. A defect in checkout costs revenue by the minute. A defect in the profile photo cropper costs a support ticket.

Rank features by failure impact and usage frequency, then allocate design depth accordingly. Money paths, authentication, and data integrity get full technique treatment: partitions, boundaries, state models, negative cases. Low-traffic settings pages get a happy path and one negative test. This isn't corner-cutting. It's acknowledging that design effort spent on low-risk areas is effort taken from high-risk ones.

Common Test Case Design Mistakes

The failure patterns are consistent across teams. Each has a specific fix.

Writing tests before designing the strategy. Jumping straight to test cases produces duplicated coverage in the obvious areas and gaps everywhere else. Fix: spend an hour partitioning inputs and mapping states before writing anything. The hour pays for itself in the first review.

Treating all test cases as equally important. When everything is priority one, regression runs take days and critical paths get the same attention as trivial ones. Fix: tag tests by risk tier and let the tier drive execution frequency.

Ignoring boundary values. Testing comfortable mid-range values misses the exact zone where off-by-one defects live. Fix: for every partition, add the boundary and the value just outside it. It's four extra tests per field, and it catches a disproportionate share of defects.

Testing every combination manually. Exhaustive combination testing explodes test count without improving detection, because most combinations exercise identical logic. Fix: pairwise generation for configuration matrices, decision tables for business rules.

Skipping negative scenarios. Suites full of valid-input tests leave error handling completely unvalidated, and error handling is where production incidents come from. Fix: for every "verify it works" test, ask what the matching "verify it fails correctly" test is.

Copying test cases across projects without adapting them. A suite designed for one product's risk profile imported wholesale into another covers the wrong things. Fix: reuse structure and components, redo the risk analysis.

AI and Test Case Design in 2026

AI has moved from novelty to a standard part of the test design toolchain, and it's worth being precise about what it does well and where it stops.

Current tools generate draft test cases directly from user stories and requirements documents, detect boundaries and equivalence classes automatically from input specifications, and convert Figma designs or application screenshots into UI test cases. Platforms with pattern recognition can suggest existing reusable components when a team designs a new scenario, cutting duplication before it happens. Self-healing capabilities update element locators and adapt tests when the application changes, reducing the maintenance drag that kills automation efforts.

The reality check: the gains are real but front-loaded. An experimental study by Thoughtworks found AI-assisted test case generation cut drafting time by roughly 80% with highly consistent output structure, but also found that over a quarter of generated test cases contained ambiguity, and that output quality depended heavily on how carefully prompts specified scope, format, and edge case expectations. 

AI performs well on standard flows and struggles with exactly the things that matter most: complex business logic, security scenarios, and the usability edge cases that come from understanding real users.

TestFiesta Makes Smart Design the Default

Everything in this guide works on a spreadsheet. It just doesn't stay working on a spreadsheet, because design discipline erodes when the tooling fights it.

TestFiesta builds the scaling strategies into the platform itself. Shared steps and centralized test data mean reusable components are the path of least resistance, not an extra process: update a component once and every linked test case reflects it. 

Tagging and custom fields make risk-based prioritization something you filter by, not something you remember. And AI-powered test case generation produces structured drafts from your requirements that fit your existing components, so the review step starts from organized output instead of a blank page.

Stop fighting with spreadsheets and start scaling your test design.

With TestFiesta, you get reusable components, AI-powered generation, and automated risk prioritization built directly into your workflow.

Try TestFiesta for free today

FAQS

What's the difference between test case design and test case writing?

Design is the analysis that decides which test cases deserve to exist: partitioning inputs, mapping states, identifying boundaries. Writing is documenting those decisions as steps and expected results. 

Should I use equivalence partitioning or boundary value analysis?

Both, in that order. Partitioning divides the input domain into classes so you know what needs testing. Boundary value analysis tells you where in those classes to test: at the edges, where off-by-one defects cluster.

How many test cases is too many?

There's no fixed number, but there's a clear symptom, such as when regression runs take days, and nobody can say which tests covered the highest-risk functionality. Risk-based prioritization and pairwise testing keep count proportional to risk. A designed suite of 300 tests routinely outperforms an accumulated suite of 2,000.

Can AI fully automate test case design?

No, AI compresses the writing, not the design. It drafts test cases quickly but still misses complex business logic, security scenarios, and usability edge cases. Deciding what's worth testing remains human work. Treat AI output as a draft to review, not a suite to run.

Testing guide
Best practices

Ready for a Platform that Works

The Way You Do?

Stop fighting your tools. Start shipping with confidence. TestFiesta adapts to your workflow, not the other way around.

Welcome to the fiesta!