Saud Ahmed is the Technical Marketing Specialist and SEO Lead at Testfiesta. He has extensive knowledge in AI tools and systems, workflow automation, search and AI engine optimization, software testing, copywriting, and content marketing roadmaps that drive awareness and sales.
For all the noise around AI-powered test case generation, the real question isn’t whether it works (we know it does). It’s whether it’s actually worth trusting artificial intelligence with the parts of your software that break under real user pressure.
All Articles
Thank you! Your submission has been received!
Oops! Something went wrong while submitting the form.
May 19, 2026
Testing guide
Best practices
QA trends
Role of DevOps in QA: A Guide to Continuous Testing
Software teams no longer have the luxury of long release cycles and isolated testing phases. Modern products are expected to ship faster, update continuously, and maintain a high level of reliability across every release. That shift is exactly why DevOps and QA have become deeply connected. Instead of treating testing as a final checkpoint before deployment, DevOps brings quality into every stage of development. QA teams are now involved much earlier, collaborate more closely with developers and operations teams, and rely heavily on automation and continuous feedback. This has fundamentally changed how software quality is managed in modern engineering environments.
Software teams no longer have the luxury of long release cycles and isolated testing phases. Modern products are expected to ship faster, update continuously, and maintain a high level of reliability across every release. That shift is exactly why DevOps and QA have become deeply connected. Instead of treating testing as a final checkpoint before deployment, DevOps brings quality into every stage of development. QA teams are now involved much earlier, collaborate more closely with developers and operations teams, and rely heavily on automation and continuous feedback. This has fundamentally changed how software quality is managed in modern engineering environments.
What Is DevOps in QA
DevOps in QA refers to integrating quality assurance practices directly into the DevOps workflow. Instead of operating as a separate department that validates software after development is complete, QA becomes part of a continuous delivery pipeline where testing happens throughout the software lifecycle.
In a DevOps environment, QA focuses on automation, continuous testing, collaboration, and rapid feedback loops. As a result, teams can identify issues early, reduce release risks, and support faster deployments without compromising software quality. The approach moves from reactive testing to proactive quality engineering.
Difference Between Traditional QA vs. DevOps QA
Traditional QA and DevOps QA differ mainly in how testing is integrated into the development process. Traditional QA typically works in separate stages, while DevOps QA emphasizes continuous involvement and automation.
In traditional QA models, testing often begins after development is completed. QA teams work independently, execute mostly manual tests, and report and manage defects late in the cycle. This creates delays, longer feedback loops, and bottlenecks before release.
DevOps QA shifts testing earlier and spreads it across the entire development pipeline. Automated tests run continuously during builds, integrations, and deployments. QA engineers collaborate closely with developers and operations teams to ensure quality remains part of every release decision rather than a final approval step.
What Are Core DevOps Principles
DevOps is built around a set of principles designed to improve collaboration, delivery speed, and software reliability. These principles create a culture where development, QA, and operations teams work together instead of operating in silos.
One of the core principles is automation. Teams automate builds, testing, deployments, and infrastructure management to reduce manual effort and improve consistency. Continuous integration and continuous delivery also play a major role by enabling rapid and reliable software releases.
Another important principle is continuous feedback. Monitoring systems, testing pipelines, and user feedback help teams quickly identify issues and improve product quality. Collaboration and shared ownership are equally critical because quality and operational stability become responsibilities shared across the entire engineering team.
The DevOps Lifecycle Explained
The DevOps lifecycle represents the continuous flow of software delivery from planning to monitoring. It focuses on speed, automation, collaboration, and ongoing improvement throughout every stage of development.
The lifecycle typically starts with planning and development, where teams define requirements and write code collaboratively.
From there, code moves into continuous integration pipelines where automated builds and tests validate functionality before deployment.
After testing, applications are released and deployed through automated delivery workflows.
Monitoring and feedback then help teams track application performance, detect issues, and improve future releases. Because the lifecycle is continuous, teams constantly iterate and optimize based on real-world data and testing insights.
Key Components of DevOps
DevOps relies on several foundational components that help teams deliver software faster and more reliably. These components support automation, communication, and continuous quality throughout the development lifecycle.
CI/CD
CI/CD stands for Continuous Integration and Continuous Delivery or Deployment. Continuous Integration ensures developers regularly merge code into shared repositories where automated tests validate every change, helping teams detect issues early before they grow into larger problems.
Continuous Delivery extends this process by automating release preparation and deployment workflows. Teams can push updates more frequently with lower risk because testing and validation happen continuously throughout the pipeline.
Automation
Automation is one of the most important pillars of DevOps. Teams automate repetitive tasks like testing, infrastructure provisioning, deployments, and monitoring to improve efficiency and consistency. This reduces manual errors and speeds up release cycles significantly. For QA teams, automation enables continuous testing across multiple environments and platforms.
Collaboration
DevOps emphasizes strong collaboration between development, QA, and operations teams. Teams share responsibility for software quality, performance, and delivery outcomes, fostering collaboration and reducing handoff delays across departments. QA engineers become active participants in planning, development discussions, deployment strategies, and post-release monitoring rather than functioning as isolated testers.
Understanding QA in the DevOps Context: The Shift from Gatekeeper to Enabler
Traditional QA teams often acted as gatekeepers responsible for approving or rejecting releases at the end of development. In DevOps, that model no longer works because modern delivery pipelines require rapid and continuous deployments.
QA in DevOps becomes an enabler of speed and quality rather than a release bottleneck. QA engineers help build automated testing strategies, improve testing coverage, and ensure quality standards are integrated directly into development workflows.
This shift also changes team dynamics. QA professionals collaborate earlier with developers, participate in design discussions, and contribute to release planning. Their focus expands from simply finding bugs to improving the overall reliability, scalability, and user experience of the product.
The Role of QA in DevOps: Key Responsibilities
QA plays a much broader role in DevOps than traditional testing alone. Modern QA engineers contribute to automation, monitoring, collaboration, and continuous improvement across the entire delivery pipeline.
Continuous Testing Throughout the Pipeline
Continuous testing validates software at every stage of development and deployment. Automated tests run during code commits, integrations, staging deployments, and production releases to catch issues as early as possible.
Test Automation and Framework Development
QA teams in DevOps environments are heavily involved in building and maintaining automation frameworks. These frameworks support unit tests, API tests, UI tests, regression tests, and integration testing across different environments, improving scalability and testing consistency.
Collaboration with Development and Operations Teams
Collaboration is central to QA success in DevOps. QA engineers work closely with developers to improve testability and ensure quality requirements are addressed during development rather than after it. They also coordinate with operations teams to validate deployment processes, monitor production environments, and troubleshoot release-related issues.
Quality Metrics and Monitoring
QA teams use metrics and monitoring tools to track software health and testing effectiveness. These metrics may include test coverage, defect leakage, deployment success rates, application uptime, performance benchmarks, and other essential testing metrics that allow teams to make data-driven quality improvements.
Security Testing Integration (DevSecOps)
Security testing has become a major responsibility within DevOps QA workflows. DevSecOps integrates security validation directly into CI/CD pipelines so vulnerabilities can be identified early during development. QA teams often automate security scans, dependency checks, and compliance validations alongside functional testing, reducing the chances of security issues reaching production.
Essential DevOps QA Best Practices
Successful DevOps QA depends on a combination of engineering practices that support automation, speed, reliability, and collaboration. These practices help teams maintain quality even in fast-moving release environments.
Shift-Left Testing Strategy
Shift-left testing means moving testing activities earlier in the software development lifecycle. Instead of waiting until the end of development, teams begin validating requirements, designs, and code changes from the start.
Test-Driven Development (TDD) and Behavior-Driven Development (BDD)
TDD focuses on writing tests before writing application code. Developers create small tests based on expected functionality, then build code that satisfies those tests. This encourages cleaner architecture and stronger testing coverage.
BDD extends this concept by using business-focused scenarios that improve collaboration between technical and non-technical stakeholders. QA, developers, and product teams can align more effectively on expected system behavior before implementation begins.
Automated Unit, Integration, and End-to-End Testing
DevOps QA relies heavily on layered automated testing strategies. Unit tests validate small pieces of code, integration tests verify communication between services, and end-to-end tests simulate real user workflows. Together, this testing pyramid provides broader coverage across the application stack.
Service Virtualization and API Testing
Service virtualization helps teams test applications even when dependent systems are unavailable or incomplete. Virtual services simulate external APIs, databases, or third-party systems so testing can continue without delays.
API testing is equally important because modern applications rely heavily on service-based architectures. Automated API tests validate data flow, integrations, security, and response accuracy much earlier than UI testing alone.
Performance and Load Testing in DevOps
Performance testing ensures applications remain stable under expected traffic and workload conditions. Load tests help teams identify bottlenecks, scalability issues, and infrastructure limitations before production releases. In DevOps environments, performance testing is increasingly automated and integrated into CI/CD pipelines.
Infrastructure as Code (IaC) Testing
Infrastructure as Code allows teams to manage infrastructure configurations using version-controlled code. Since infrastructure changes can introduce deployment issues, testing these configurations becomes critical in DevOps workflows. IaC testing validates configuration accuracy, security policies, environment consistency, and deployment reliability, reducing infrastructure-related failures.
How TestFiesta Streamlines DevOps QA Workflows
Modern DevOps teams need testing platforms that support automation, collaboration, and continuous delivery without creating operational complexity. TestFiesta helps streamline QA workflows by integrating testing directly into DevOps processes and reducing friction across teams.
Native CI/CD Integration for Seamless Testing
TestFiesta integrates directly with CI/CD pipelines, allowing automated test execution during builds and deployments. This ensures testing becomes part of the delivery workflow instead of a separate manual process. Teams receive faster feedback on code quality and release readiness.
Automated Test Management in DevOps Pipelines
Managing large-scale automated testing can quickly become difficult without centralized visibility. TestFiesta helps teams organize, execute, and monitor automated tests across different environments and release stages. Teams can scale automation efforts more effectively without losing visibility into testing outcomes and coverage.
Real-Time Collaboration Between Dev, QA, and Ops Teams
DevOps depends heavily on cross-functional collaboration, and TestFiesta supports that through shared visibility and centralized communication. Developers, QA engineers, and operations teams can work from the same testing workflows and reporting systems. Teams spend less time switching between disconnected tools and more time improving delivery quality.
Native Defect Tracking Without Tool Switching
Defect tracking becomes more efficient when issues are connected directly to testing activities. TestFiesta’s native defect tracking allows teams to manage defects within the same environment used for test execution and reporting. This simplifies bug tracking workflows and improves traceability between tests, failures, and releases. It also reduces context switching, which helps teams respond to issues more quickly.
Comprehensive Test Reporting and Quality Metrics
Visibility into testing performance is critical for DevOps teams operating at high release velocity. TestFiesta provides customizable dashboards and centralized reporting and quality metrics that help teams track testing effectiveness, release health, and defect trends. Teams can quickly identify weak areas in testing coverage and optimize their QA strategies over time.
Conclusion
DevOps has completely reshaped the role of QA in modern software development. Quality is no longer treated as a final checkpoint handled by isolated testing teams. Instead, QA is integrated into every stage of the DevOps lifecycle through automation, continuous testing, collaboration, and rapid feedback loops. This shift allows organizations to release software faster while maintaining reliability, security, and performance standards.
QA engineers now play a strategic role in improving delivery pipelines, monitoring quality metrics, and enabling continuous improvement across teams. As software delivery becomes increasingly fast-paced, DevOps QA practices are becoming essential rather than optional. Teams that successfully combine DevOps and QA are better positioned to build stable, scalable, and user-focused products.
Frequently Asked Questions
Do you need coding skills for DevOps QA?
Yes, coding skills are increasingly important for DevOps QA because modern testing environments rely heavily on automation and scripting. QA engineers often work with automated test frameworks, CI/CD pipelines, API testing tools, and infrastructure automation platforms that require technical knowledge. While not every QA role requires advanced programming expertise, understanding scripting languages like Python, JavaScript, or Java can significantly improve automation capabilities. Coding skills also help QA engineers collaborate more effectively with developers and troubleshoot testing issues faster. As DevOps adoption grows, technical proficiency becomes a major advantage for QA professionals working in fast-paced engineering teams.
What are the best tools for DevOps testing?
The best tools for DevOps testing depend on the type of testing and the organization’s technology stack. Commonly used tools include Selenium and Cypress for UI automation, JUnit and TestNG for unit testing, Postman and REST Assured for API testing, and JMeter for performance testing. CI/CD platforms like Jenkins, GitHub Actions, and GitLab CI are also essential for automating testing workflows. Many teams additionally use test management platforms like TestFiesta to centralize test execution, reporting, collaboration, and defect tracking. The most effective DevOps testing strategy usually combines multiple tools that integrate smoothly into automated delivery pipelines.
How do you implement shift-left testing in DevOps?
Shift-left testing in DevOps is implemented by introducing testing activities earlier in the software development lifecycle. Teams start validating requirements, reviewing designs, writing automated tests, and performing security checks before development is fully complete. Developers and QA engineers collaborate closely during planning and coding stages to ensure testability and early defect detection. Automated unit tests, API tests, and static code analysis are commonly integrated directly into CI pipelines to provide immediate feedback. This approach reduces costly late-stage defects and improves release stability by identifying issues before they progress deeper into the delivery process.
What is the difference between continuous testing and test automation?
The difference between continuous testing and test automation is that test automation refers to using tools and scripts to execute tests automatically, while continuous testing is a broader strategy that integrates automated testing throughout the entire DevOps pipeline. Test automation is one component of continuous testing. Continuous testing includes not only automated execution but also continuous feedback, quality monitoring, risk analysis, and validation during development and deployment stages. In other words, automation provides the technical capability, while continuous testing defines how testing is continuously applied to support rapid and reliable software delivery in DevOps environments.
How does DevOps improve software quality?
DevOps improves software quality by integrating testing, automation, monitoring, and collaboration directly into the software delivery process. Continuous integration and continuous testing allow teams to identify defects much earlier than traditional development models. Automation reduces human error and improves consistency across builds, deployments, and testing workflows. Collaboration between development, QA, and operations teams also improves communication and accelerates issue resolution. Additionally, monitoring and feedback from production environments help teams continuously optimize performance, reliability, and user experience. Together, these practices create faster release cycles while maintaining stronger software stability and overall product quality.
Testing guide
Best practices
QA trends
April 23, 2026
Best practices
What Is Defect Management: Strategy & Best Practices
Defect management is a critical process in software testing that decides whether a software product is reliable. At its core, it’s the structured process of identifying, documenting, tracking, and resolving issues, also known as defects or bugs, throughout the software development lifecycle. But in practice, it’s much more than just “finding bugs and fixing them.”
Defect management is a critical process in software testing that decides whether a software product is reliable. At its core, it’s the structured process of identifying, documenting, tracking, and resolving issues, also known as defects or bugs, throughout the software development lifecycle. But in practice, it’s much more than just “finding bugs and fixing them.”
A strong defect management strategy helps teams understand patterns, prioritize what actually matters, and prevent the same issues from repeating in future releases. Without it, teams often end up reacting to problems instead of controlling them. That usually leads to missed deadlines, inconsistent quality, and a lot of back-and-forth between QA and development.
In this blog, we’ll break down what defect management really means, why it’s critical for modern QA teams, and the best practices that make it actually work in real-world projects.
What Is Defect Management?
Defect management is the process of systematically identifying, recording, tracking, and resolving issues (defects or bugs) found in software during development and testing. It ensures that every defect is properly documented with clear details so teams can reproduce, analyze, and fix it efficiently. The goal is to maintain software quality by making sure no critical issue slips through unnoticed or unresolved. In simple terms, it’s the structured workflow that helps teams control and eliminate problems before the product reaches end users.
Defect Management vs. Defect Tracking
Defect management and defect tracking are often used interchangeably, but they’re not quite the same thing. Defect tracking is just one part of the bigger process. It focuses specifically on recording, monitoring, and updating the status of individual bugs as they move through their lifecycle.
Defect management, on the other hand, is broader. It includes not only tracking but also prioritizing, analyzing root causes, assigning ownership, and ensuring defects are resolved effectively.
In short, tracking is about “following” a defect, while management is about “handling” the entire workflow around it.
Why Defect Management Matters in Software Development
Defect management plays a critical role in ensuring software is reliable, scalable, and ready for real users. Without a structured approach, even small issues can snowball into major failures that affect timelines, budgets, and user trust.
The Cost of Unmanaged Defects
When defects are not properly managed, they tend to multiply and become significantly more expensive to fix later in the development cycle. A bug that could have been resolved in minutes during development might turn into a major production issue if ignored. This often leads to emergency fixes, delayed releases, and increased engineering costs. In some cases, it can even result in system downtime or revenue loss.
Impact on Product Quality and Customer Satisfaction
Unmanaged defects directly affect how stable and reliable a product feels to users. Frequent bugs or glitches reduce trust and can push users to switch to competitors. Over time, this damages brand reputation and lowers customer retention. High-quality software, on the other hand, depends heavily on disciplined defect management throughout development.
Defect Management and Team Collaboration
Effective defect management improves how QA, developers, and product teams work together. It creates a shared system where issues are clearly documented, prioritized, and assigned without confusion. This reduces miscommunication and prevents defects from getting lost in back-and-forth discussions. As a result, teams spend less time debating problems and more time actually solving them.
Measurable Business Benefits
Strong defect management leads to faster release cycles and more predictable delivery timelines. It also reduces rework, which directly improves development efficiency and lowers costs. From a business perspective, it enhances product reliability, which supports higher customer satisfaction and retention. Ultimately, it contributes to a more stable and scalable software delivery process.
The Complete Defect Management Process
Defect management follows a structured lifecycle that helps teams handle issues in a consistent and controlled way. Each stage plays a specific role in making sure defects are identified early, resolved efficiently, and prevented from recurring. When followed properly, this process improves both software quality and team productivity.
Stage 1: Defect Prevention and Risk Identification
This stage focuses on reducing the chances of defects appearing in the first place. Teams review requirements, design decisions, and past project issues to spot potential risk areas early. The goal is to prevent problems before any code is even written. It saves time later by reducing avoidable rework.
Stage 2: Defect Discovery Through Testing
At this stage, QA teams actively test the software to uncover bugs. These issues are identified through different testing methods like manual testing, automation, or exploratory testing. The focus is on catching anything that doesn’t behave as expected. Early discovery makes fixes faster and cheaper.
Stage 3: Defect Logging and Documentation
Once a defect is found, it needs to be properly recorded in a tracking system. This includes details like steps to reproduce, expected vs actual behavior, severity, and screenshots if needed. Good documentation ensures developers clearly understand the issue. Poor logging usually leads to delays and confusion.
Stage 4: Defect Triage and Prioritization
Not all defects are equal, so this stage is about deciding what gets fixed first. Teams evaluate severity, business impact, and urgency to prioritize issues. Critical bugs affecting core functionality are handled before minor ones. This keeps development focused on what matters most.
Stage 5: Defect Assignment and Resolution
After prioritization, defects are assigned to the right developer or team. The assigned owner investigates the issue, identifies the root cause, and implements a fix. Clear ownership helps avoid delays and miscommunication. The goal here is to resolve the defect efficiently without introducing new issues.
Stage 6: Verification and Regression Testing
Once a fix is applied, QA verifies whether the defect has actually been resolved. They also run regression tests to ensure the fix hasn’t broken other parts of the system. This step is crucial for maintaining overall software stability. It acts as a safety check before moving forward.
Stage 7: Defect Closure and Status Management
If the fix passes verification, the defect is marked as closed in the tracking system. However, if the issue still exists or behaves unexpectedly, it may be reopened. Proper status management keeps everyone aligned on what’s resolved and what still needs attention. It also helps maintain an accurate project record.
Stage 8: Defect Reporting and Analysis
In the final stage, teams analyze defect data to identify patterns and recurring issues. Reports help stakeholders understand product quality and team performance over time. This insight is used to improve processes and prevent similar defects in the future. Over time, it makes the entire development cycle more efficient and predictable.
Essential Features of Defect Management Systems
A good defect management system is the backbone of how QA and development teams stay aligned. It brings structure, visibility, and control to the entire defect lifecycle. The right features make it easier to track issues, collaborate effectively, and make data-driven decisions.
Centralized Defect Repository
A centralized repository keeps all defects in one place instead of scattered across emails, spreadsheets, or chats. This makes it easier for teams to search, track, and manage issues without losing context. Everyone works from the same source of truth, which reduces confusion. It also improves transparency across QA and development teams.
Customizable Workflow Management
Every team works differently, so flexibility in workflows is essential. A good system allows teams to define their own defect stages, statuses, and approval processes. This ensures the tool adapts to the team, not the other way around. It helps teams stay aligned with their internal development practices.
Priority and Severity Classification
Not all bugs carry the same weight, so classification helps teams focus on what matters most. Severity reflects how serious the issue is, while priority defines how urgently it should be fixed. Together, they guide decision-making during triage. This ensures critical issues are handled before minor ones.
Assignment and Notification Capabilities
Defects need to reach the right people quickly to avoid delays. Assignment features ensure every issue has a clear owner responsible for fixing it. Notifications keep teams updated whenever there are status changes or comments. This reduces back-and-forth and keeps the workflow moving smoothly.
Integration with Testing and Development Tools
Modern teams rely on multiple tools, so integration is key for efficiency. A strong defect management system connects with test management platforms, CI/CD pipelines, and development tools. This eliminates manual updates and keeps data synchronized across systems. It also improves visibility across the entire development lifecycle.
Reporting and Analytics Dashboards
Dashboards help teams understand defect trends, open issues, and resolution progress at a glance. Reporting tools turn raw data into actionable insights. Teams can identify bottlenecks, recurring issues, and overall product quality trends. This makes decision-making more informed and strategic.
Audit Trail and Version Control
An audit trail tracks every change made to a defect, including updates, comments, and status changes. This creates a clear history of how issues were handled over time. Version control ensures nothing gets lost when updates are made. It’s especially useful for accountability and compliance in larger teams.
Defect Management Strategy Best Practices for QA Teams
Best practices in defect management help teams stay consistent, reduce waste, and improve overall software quality. When these practices are followed well, defect handling becomes faster, clearer, and far more predictable.
Establish Clear Defect Classification Criteria
Teams should agree on how defects are categorized from the start. This includes defining severity levels, priority rules, and what qualifies as a valid bug. Without clear criteria, teams often waste time debating how important an issue is. A shared standard keeps everyone aligned and speeds up decision-making.
Define Defect Lifecycle Workflows
A well-defined workflow ensures every defect moves through a consistent process from discovery to closure. This includes stages like new, in progress, fixed, and verified. Clear workflows reduce confusion and prevent issues from getting stuck. It also helps teams understand exactly where each defect stands at any time.
Prioritize Based on Business Impact
Not all bugs should be treated equally, especially in fast-moving projects. Prioritization should consider how much a defect affects users, revenue, or critical functionality. This ensures teams focus their effort where it matters most. It also helps avoid wasting time on low-impact issues while major problems remain unresolved.
Implement Root Cause Analysis
Fixing a bug is not enough if the underlying cause is not understood. Root cause analysis helps teams identify why a defect occurred in the first place. This prevents the same issue from repeating in future releases. Over time, it leads to stronger, more stable software.
Foster Developer-Tester Collaboration
Defect management works best when developers and testers communicate openly and frequently. Collaboration reduces misunderstandings and speeds up resolution. Instead of working in silos, both teams should share responsibility for quality. This creates a more efficient and cooperative development environment.
Maintain Comprehensive Documentation
Good documentation ensures every defect is clearly recorded and easy to understand. This includes reproduction steps, screenshots, logs, and resolution notes. Proper documentation saves time during debugging and future reference. It also helps new team members get up to speed quickly.
Track and Measure Key Defect Metrics
Metrics like defect density, resolution time, and reopen rate provide valuable insights into team performance. Tracking these helps teams understand trends and identify problem areas. It also supports better planning and process improvement. Without metrics, defect management becomes guesswork.
Defect Rejection Ratio (DRR): Measures the percentage of reported defects rejected as invalid or duplicates, helping assess the quality of bug reporting.
Defect Leakage Ratio (DLR): Indicates how many defects escape into production after testing, reflecting the effectiveness of QA processes.
Defect Density and Distribution: Shows the number of defects per module or size of code and helps identify error-prone areas in the application.
Mean Time to Resolution (MTTR): Tracks the average time taken to fix and close a defect, highlighting team efficiency in resolving issues.
Defect Age and Aging Trends: Measures how long defects remain open, helping teams spot bottlenecks and unresolved backlog issues.
Defect Removal Efficiency (DRE): Evaluates how effectively defects are identified and fixed before release, indicating overall testing effectiveness.
Cost of Quality Metrics: Calculates the total cost of preventing, detecting, and fixing defects, showing the financial impact of quality efforts.
Regular reviews help teams stay on top of open and critical issues. These meetings are used to discuss trends, unresolved defects, and process improvements. They ensure accountability and keep everyone aligned. Over time, they help teams continuously refine their defect management approach
Common Defect Management Challenges (and How to Overcome Them)
Even with the right tools and processes in place, defect management can still get messy if teams aren’t aligned. Most challenges come from communication gaps, inconsistent practices, or disconnected systems. The good news is that each of these issues has a practical fix when approached strategically.
Tool Fragmentation and Context Switching
When teams use multiple disconnected tools, defect information gets scattered across platforms. This forces developers and testers to constantly switch contexts, which slows down productivity. It also increases the chance of missing important updates. The solution is to consolidate workflows into a single integrated system wherever possible.
Inconsistent Defect Reporting Standards
If every team member reports defects differently, it becomes harder to understand and act on them. Missing details, unclear steps, or inconsistent formats often lead to delays or rejected bugs. This creates unnecessary back-and-forth between QA and development. Standardized templates and clear reporting guidelines help solve this issue.
Poor Communication Between Teams
Lack of communication between QA, developers, and product teams often leads to confusion and duplicated effort. Defects may be misunderstood or deprioritized incorrectly due to missing context. This slows down resolution and affects overall quality. Regular syncs and transparent collaboration channels can significantly improve this.
Inadequate Prioritization Frameworks
Without a clear prioritization system, teams often struggle to decide which defects to fix first. This can result in critical issues being delayed while minor ones get attention. It creates inefficiency and risks product stability. A structured framework based on severity and business impact helps avoid this problem.
Lack of Visibility into Defect Status
When teams cannot clearly see where a defect stands in its lifecycle, it creates uncertainty and delays. Stakeholders may not know whether an issue is being worked on or waiting in a queue. This lack of transparency reduces trust in the process. Dashboards and real-time tracking help improve visibility.
Integration Issues Between Systems
Many teams use separate tools for testing, development, and project management, which don’t always integrate well. This leads to manual updates and data inconsistencies across systems. It increases the workload and the risk of outdated information. Proper tool integration ensures smoother data flow and reduces duplication.
Defect Data Silos and Duplication
When defect data is stored in isolated systems or teams, it often leads to duplicate bug reports and fragmented information. This makes analysis harder and wastes time on redundant work. It also distorts reporting metrics and insights. Centralizing defect data helps eliminate silos and improves accuracy.
Native vs. Integrated Defect Management: What's the Difference?
Defect management can be handled either through native systems built directly into a platform or through integrations with third-party tools. Both approaches aim to track and resolve defects, but they differ significantly in how smoothly they fit into the workflow. Understanding this difference helps teams choose a setup that actually supports efficiency rather than slowing it down.
Understanding Native Defect Management
Native defect management means the defect tracking system is built directly into the test management or project management platform. This creates a seamless workflow where testing, logging, and tracking all happen in one place. It reduces the need to switch between tools and keeps all data connected. As a result, teams get better visibility and faster collaboration.
Third-Party Integrations: Benefits and Limitations
Third-party integrations allow teams to connect separate tools like Jira or other issue trackers with their testing systems. While this offers flexibility and allows teams to use specialized tools, it can also introduce complexity. Data syncing issues, delays, or misalignment between systems can occur. It works well for some teams, but often requires careful maintenance.
The Hidden Costs of Tool Fragmentation
Using multiple disconnected tools may seem flexible at first, but it often leads to hidden inefficiencies. Teams spend extra time switching between systems, duplicating data, and fixing inconsistencies. Over time, this slows down delivery and increases operational overhead. These hidden costs usually become more visible as teams scale.
Why Unified Platforms Improve Workflow Efficiency
Unified platforms bring defect tracking, testing, and reporting into a single system. This reduces friction and ensures everyone works with the same real-time test data. It also simplifies collaboration since teams don’t need to rely on external integrations. The result is faster resolution times and a smoother overall workflow.
Evaluating Your Team's Needs
Choosing between native and integrated approaches depends on team size, complexity, and workflow requirements. Smaller teams often benefit more from unified systems, while larger organizations may need flexibility from integrations. The key is to balance efficiency with scalability. A clear understanding of current pain points helps make the right decision.
How TestFiesta Eliminates Defect Management Fragmentation
Fragmentation is one of the biggest reasons defect management breaks down; too many tools, too many gaps, and not enough visibility. This is where a unified platform like TestFiesta changes the game by bringing everything into one place. Instead of patching together workflows, it streamlines the entire defect lifecycle from start to finish.
Complete Defect Lifecycle Management in One Platform: TestFiesta handles everything from defect discovery to closure within a single system. This means no more jumping between tools to log, track, or verify issues. It keeps the entire lifecycle connected, making defect handling faster and more organized.
Real-Time Collaboration Without Tool Switching: Teams can collaborate instantly on defects without relying on external tools or endless back-and-forth. Developers, testers, and stakeholders all work within the same environment. This reduces delays and ensures everyone is always on the same page.
Unified Reporting Across Testing and Defects: TestFiesta combines testing data and defect data into a single reporting layer. This gives teams a clearer view of quality, progress, and risk without piecing together reports from different tools. Better insights lead to smarter decisions.
Customizable Workflows That Match Your Process: Every team has its own way of working, and TestFiesta adapts to that. You can define workflows, statuses, and transitions that align with your process. This flexibility ensures the system supports your team instead of forcing rigid structures.
Native Capabilities vs. Third-Party Dependencies: With native defect tracking built in, TestFiesta reduces the need for external integrations. This eliminates common issues like data syncing errors and tool conflicts. The result is a more stable, reliable, and efficient workflow overall.
Conclusion
Defect management is not just a QA activity. It’s a core discipline that directly impacts product quality, delivery speed, and user satisfaction. When teams follow a structured approach, supported by the right processes and tools, they can significantly reduce escaped defects and improve overall efficiency. The key takeaway is that strong defect management depends on clarity, consistency, and collaboration across teams. It’s also clear that relying on fragmented tools often creates more problems than it solves, while unified systems help streamline the entire workflow. Ultimately, mastering defect management means shifting from reactive bug fixing to a proactive quality mindset that continuously improves how software is built and delivered.
Frequently Asked Questions
What is the difference between defect tracking and defect management?
The difference between defect tracking and defect management is that tracking focuses on recording and monitoring individual defects, while management covers the entire lifecycle of how defects are handled. Defect tracking is mainly about capturing details like status, severity, and updates as a bug moves through stages. Defect management goes further by including prioritization, assignment, workflow control, root cause analysis, and reporting.
What should be included in a defect report?
A proper defect report should include all the information needed for a developer to understand, reproduce, and fix the issue. This typically includes a clear title, detailed description, steps to reproduce, expected vs actual results, and environment details such as browser or device. It should also include severity and priority to help with triage decisions. Screenshots, logs, or screen recordings are highly useful for clarity. A well-written defect report reduces back-and-forth communication and speeds up resolution by giving developers everything they need upfront without ambiguity.
How do you prioritize defects effectively?
Defect prioritization is based on understanding both business impact and technical severity. Critical issues that affect core functionality, security, or large user groups should always be addressed first. Lower-priority bugs, such as minor UI issues, can be scheduled later. Teams often use a combination of severity levels and business urgency to make decisions during triage meetings.
What are the most important defect management metrics?
The most important defect management metrics include Defect Leakage Ratio, Mean Time to Resolution (MTTR), Defect Density, and Defect Removal Efficiency (DRE). These metrics help teams understand how effectively they are identifying and resolving issues.
Can you do defect management without a dedicated tool?
Defect management can be done without a dedicated tool, but it becomes inefficient and harder to scale. Teams may rely on spreadsheets, emails, or manual tracking methods, but these often lead to missed updates, duplication, and a lack of visibility. As the project grows, managing defects manually becomes increasingly complex and error-prone. Dedicated test management and defect tracking tools provide structure, automation, and real-time collaboration that manual methods cannot match.
How does defect management integrate with Agile methodologies?
In Agile methodologies, defect management is integrated directly into iterative development cycles. Defects are typically logged and addressed within the same sprint or backlog, depending on priority. Agile encourages continuous testing and feedback, which means defects are identified and resolved quickly rather than being delayed until later phases. This aligns well with defect management practices like prioritization, rapid triage, and continuous improvement.
What is the role of a test manager in defect management?
The role of a test manager in defect management is to oversee the entire defect lifecycle and ensure the process runs smoothly. They are responsible for defining workflows, setting quality standards, and ensuring proper defect reporting and prioritization. Test managers also coordinate between QA, developers, and stakeholders to resolve issues efficiently. Additionally, they analyze defect trends and metrics to identify risks and process improvements.
How do you reduce defect leakage to production?
Reducing defect leakage to production requires strong software testing practices combined with effective defect management processes. This includes thorough test coverage, early testing in the development cycle, and proper regression testing before release. Clear defect prioritization ensures critical issues are not missed or delayed. Automation testing also helps catch repetitive or high-risk issues early. Additionally, continuous review of defect trends helps teams identify weak areas in their testing strategy.
Best practices
April 20, 2026
Product updates
Native Defect Tracking: Stop Switching Between Tools
Quality assurance teams lose an average of 20-30 minutes per day switching between test management tools and defect tracking systems. That’s over 2.5 hours per week spent navigating interfaces, copying data, and maintaining context across disconnected platforms. For a team of five QA engineers, this translates to nearly 600 hours annually, which is time that could be spent actually testing.
Quality assurance teams lose an average of 20-30 minutes per day switching between test management tools and defect tracking systems. That’s over 2.5 hours per week spent navigating interfaces, copying data, and maintaining context across disconnected platforms. For a team of five QA engineers, this translates to nearly 600 hours annually, which is time that could be spent actually testing.
The root cause? Most test management platforms force you to integrate with external defect tracking tools like Jira.
Native defect tracking eliminates this waste by bringing defect management directly into your test management platform.
In this guide, we’ll explore why native defect tracking is transforming how teams manage quality, the hidden costs of tool switching, and how modern test management platforms make defect tracking seamless.
What Is Defect Tracking
Defect tracking is the systematic process of recording, monitoring, and managing software bugs from discovery through resolution. It ensures no defect falls through the cracks and gives teams visibility into software quality status.
The core workflow includes:
Discovery and logging: Testers document issues during test execution, including reproduction steps, severity, priority, and affected components.
Assignment and triage: Defects route to developers based on ownership, with priority levels determining resolution order.
Status tracking: Each defect moves through defined stages (New → In Progress → Fixed → Verified → Closed).
Resolution verification: Once fixed, testers verify the solution through retesting before closing the issue.
Effective defect tracking creates a closed loop between testing and development. When a test fails, the resulting defect should maintain clear traceability back to the original test case, requirements, and related issues. This traceability helps teams understand quality trends, identify problematic areas, and ensure comprehensive test coverage.
Types of Defect Tracking Software
Organizations take three primary approaches to defect tracking, each with distinct implications for workflow efficiency, cost, and team productivity.
1. Standalone Defect Tracking Tools
Standalone tools like Bugzilla and MantisBT focus exclusively on bug management. These specialized platforms offer deep functionality for logging, categorizing, and tracking defects through their lifecycle.
A primary benefit of standalone defect tracking tools is purpose-built features for defect workflows, customizable fields and workflows, and often open-source licensing with minimal costs.
The challenge: these tools exist in isolation from your test management platform. Testers manually copy information between systems, maintain duplicate records, and constantly switch contexts. There’s no automatic link between test failures and defects, which makes traceability difficult and increases miscommunication risk.
These tools are best for organizations with minimal testing requirements or those already invested in a standalone bug tracking infrastructure.
2. Integrated Project Management Tools
The most common approach in the industry is integrated project management tools like Jira, Azure DevOps, or Linear for defect tracking. These platforms weren’t designed for testing, but became de facto standards because organizations already use them for project management.
A popular advantage of integrated tools is their centralized visibility for development teams, existing organizational investment, and strong integration ecosystems, which enable testing tools and test management platforms to easily integrate with these tools.
The challenge: QA teams must constantly switch tools, even with integration. Test management platforms integrate with Jira through APIs, but testers still leave their testing environment to view defect details, add comments, or check status. This context switching disrupts flow and creates friction. Additionally, Jira licenses add a high cost, on top of test management expenses.
It’s best for organizations that are already standardized on these platforms for project management, or larger enterprises with a budget for multiple tool licenses.
3. Test Management Platforms With Built-in Defect Tracking
Native defect tracking brings bug management directly into the test management platform. Instead of integrating with external tools, everything happens in one place.
This approach opens up a whole new venue of advantages, including zero context switching for testers, automatic traceability from test to defect, unified reporting, elimination of integration maintenance, and reduced tool stack costs.
Built-in, native, or unified defect tracking is ideal for QA-focused teams that want to prioritize efficiency and cost-effectiveness, reduce tool sprawl, are frustrated with constant tool switching, and are seeking to eliminate Jira dependencies.
What Is Native Defect Tracking
Native defect tracking means your test management platform includes built-in defect management capabilities without requiring integration with external tools. When a test fails, you create, track, and resolve defects without leaving your testing environment.
What distinguishes native defect tracking:
Single environment: Everything happens in one platform. You execute tests, log defects, track resolution progress, and generate reports within the same interface. No jumping to Jira, no copying data between tools, no maintaining multiple browser tabs.
Automatic traceability: Because defects live in the same system as your tests, the platform automatically maintains relationships. You can instantly see which test execution produced a defect, which test cases are blocked by open defects, and how defects relate to specific test runs or releases.
Unified data model: Test results, defect data, and quality software testing metrics share the same underlying database. This enables powerful reporting that spans your entire testing lifecycle—defect trends by test suite, resolution times correlated with test coverage, and quality dashboards that combine test pass rates with defect density.
Seamless workflow: The defect creation process is optimized for testers. When a test fails, the platform pre-populates defect forms with execution context, screenshots, logs, and environment details automatically. No manual copying or information loss.
Native defect tracking doesn’t mean isolation. Modern platforms with native defect tracking still provide APIs and integrations so development teams can access defect information in their tools of choice. The key difference is that QA teams aren’t forced out of their environment to do their work.
Why Native Defect Tracking Is Better Than Integrated or Separate Tools
The testing workflow should be fluid: execute tests, identify failures, document defects, track resolution, and verify fixes. Every time you switch tools, that flow breaks.
Workflow continuity eliminates cognitive overhead. When testers stay in their test management platform from test execution through defect resolution, they maintain mental context. They’re not reorienting themselves to a different interface, searching for tests they were just executing, or trying to remember which details need copying over. This continuity reduces cognitive load and prevents errors that occur during context switching.
Time savings compound across teams. Studies show that regaining focus after an interruption takes an average of 23 minutes. When QA teams switch to Jira dozens of times per day, those interruptions accumulate. Native defect tracking prevents this context switching.
Traceability becomes automatic. With external defect tracking, maintaining links between tests and defects requires discipline. Testers must remember to add test case IDs to Jira tickets, link back to test runs, and keep both systems synchronized. Native defect tracking makes this automatic. The platform knows exactly which test execution produced each defect, which requirements are covered, and how defects cluster across your test suites.
Data integrity improves dramatically. Manual data entry between systems introduces errors. Testers might copy the wrong environment details, forget to include reproduction steps, or lose valuable logs during the transfer. Native defect tracking captures execution context automatically, ensuring defects contain complete information for developers.
Onboarding and training accelerate. New team members learn one platform instead of two. They don’t need to understand how Jira integration works or navigate two different permission models. This simplification reduces onboarding time and gets new testers productive faster.
Cost reduction extends beyond licensing. Yes, eliminating Jira licenses saves money directly. But the larger savings come from reduced integration maintenance, simplified infrastructure, and improved productivity.
The Jira Defect Tracking Approach: Benefits and Limitations
Jira dominates defect tracking because it's already deployed for project management. Understanding why teams choose Jira and where that choice creates friction helps contextualize the native defect tracking alternative.
Why Teams Choose Jira for Defect Tracking
Here’s why most teams think Jira is a good solution for defect tracking:
Organizational standardization: Most development organizations already use Jira for sprint planning, backlog management, and project tracking. Using it for defects means one tool for all development work, creating unified visibility for product managers, engineering leaders, and stakeholders.
Developer familiarity: Engineers work in Jira daily. They know the interface, understand the workflow, and have their notification preferences configured. Using Jira for defects means developers don’t need to learn a new tool or monitor another system.
Integration ecosystem: Thousands of Jira integrations exist, connecting it to CI/CD pipelines, monitoring systems, communication tools, and more. This ecosystem enables automation, such as automatically creating defects from production monitoring or linking commits to bug fixes.
Enterprise features: For large organizations and enterprise testing, Jira provides advanced capabilities like portfolio management, cross-project reporting, and sophisticated permission models that control access at granular levels.
These benefits are real, but they’re primarily from the development team’s perspective. QA teams experience a different reality.
Common Challenges With Jira-Based Workflows
Here are some common challenges with Jira-based workflows:
Disrupted testing flow: Testers execute tests in their test case management platform, but when failures occur, they must switch to Jira. This means opening a new browser tab or application, navigating to the correct project, creating an issue, manually copying test details, attaching screenshots, and linking back to the test run. This process interrupts the testing rhythm and creates friction dozens of times per day.
Lost execution context: When creating Jira defects, testers must manually transcribe information from their test management platform. Environment details, test configurations, execution logs, and reproduction steps require manual copying. This creates opportunities for information loss and transcription errors that can make defects harder to resolve.
Weak test traceability: While test management platforms integrate with Jira, the connection is one-directional. You can link a Jira issue to a test case, but seeing the full context—which test run produced this defect, what other tests failed similarly, which related tests are now blocked—requires switching back to your test management tool and manually piecing together the story.
Configuration complexity: Making Jira work well for testing requires significant configuration. You need custom issue types for defects, specific workflows for bug lifecycle, integration setup between your test management platform and Jira, field mapping to ensure data flows correctly, and ongoing maintenance as either system updates. Many teams end up with fragile configurations that break regularly.
License costs multiply: Jira isn’t free for commercial use. At $7.75 per user monthly (Standard tier) or $15.25 (Premium), costs add up quickly. A 10-person QA team pays $930-$1,830 annually just for Jira access, in addition to their test management platform licenses. For organizations with large QA teams, this represents substantial unnecessary expense.
The Cost of Tool Switching and Context Loss
Beyond time and monetary costs, context switching introduces quality risks. When manually copying information between systems, details get lost.
Human errors are likelier to occur in a model that requires context switching. A tester might forget to include the specific test data that triggered the failure, omit environment configuration details, or fail to note that multiple test cases exhibited the same symptom.
These gaps slow resolution as developers need to ask for missing information or attempt to reproduce issues with incomplete details.
Native Defect Tracking vs External Tools: A Comparison
Understanding the practical differences between native defect tracking and external tool integration helps teams make informed decisions about their testing infrastructure.
Workflow Continuity: Testing and Tracking in One Place
Native defect tracking: Execute test → Test fails → Click “Create Defect” in the same interface → Defect form pre-populated with execution context → Add specific notes → Submit.
Total time: 60-90 seconds. Tester never leaves the testing platform.
External tools (Jira): Execute test → Test fails → Switch to Jira (open browser tab, navigate to project) → Click Create Issue → Manually select project, issue type, priority → Copy test case name, ID, execution details from test management platform → Attach screenshots manually → Fill description with reproduction steps → Add environment details manually → Link back to test management platform → Submit.
Total time: 3-4 minutes. Requires switching contexts and manually copying information.
The difference in a single instance seems small, but multiply across hundreds of defects monthly, and the time gap becomes significant. More importantly, the native approach maintains psychological flow. Testers stay focused on quality rather than administrative overhead.
Reduced Context Switching Increases Productivity
Context switching isn’t just about time. It’s also about cognitive load and focus. Every time you switch tools, you’re asking your brain to shift modes: from testing mindset to issue-management mindset, from test management UI to project management UI, from QA terminology to development terminology.
Research from a report published by Microsoft and McKenzie shows that workers who maintain fewer tool contexts demonstrate higher output quality and faster task completion. QA engineers using native defect tracking report spending more time analyzing test results and less time on administrative tasks.
Better Traceability From Test Case to Defect
Traceability with external tools: Test cases link to Jira issues via reference IDs. To understand the full context, you need to:
Open the test case in your test management platform
Note the Jira issue ID
Switch to Jira to view the defect
Switch back to see related test cases
Use separate reports in each system to understand patterns
Traceability with native defect tracking: Automatic bidirectional links provide:
One-click navigation from test execution to defect and back
Automatic relationship mapping (which tests are blocked by which defects)
Unified reports showing test pass rates alongside defect trends
Requirement traceability from user story through test case to defect
Historical analysis showing which test areas generate the most defects
External Tools vs Native Defect Tracking: A Comparison
Feature
External Tools (Jira)
Native Defect Tracking
Avg. time to create defect
3–4 minutes
60–90 seconds
Context switching
Required
None
Execution context capture
Manual
Automatic
Test-to-defect traceability
Manual linking
Automatic bidirectional
Additional license cost
$7.75–15.25/user/month
None
Integration maintenance
2–4 hours/month
None
Defect resolution time
5–7 days average
3–4 days average
Unified reporting
Requires data export/merge
Built-in
How TestFiesta Simplifies Testing With Native Defects Tracking
TestFiesta recognized that forcing QA teams to leave their testing platform for defect tracking creates unnecessary friction. That’s why defect tracking and management are built directly into the platform, not as an integration, but as a core feature designed specifically for testing workflows.
Track Defects Without Leaving Your Test Management Platform
When a test fails in TestFiesta, creating a defect is immediate. Click “Create Defect” directly from the test result, and TestFiesta opens a defect form pre-filled with execution details, including test case name, execution ID, environment configuration, timestamp, and any captured logs or screenshots.
Testers add their observations, select severity and priority, assign the defect to a developer (or let auto-assignment rules handle it), and submit. The entire process takes less than a minute, and testers never leave the TestFiesta interface.
For developers, TestFiesta provides role-based access. They receive notifications about assigned defects, can view full test execution context, add comments, update status, and see related test cases, all without needing full test management privileges. Development teams get the information they need without QA teams sacrificing workflow efficiency.
Seamless Test-To-Defect Traceability
TestFiesta is a flexible test management solution that automatically maintains the relationship between test executions and defects. When you view a defect, you can see exactly which test run produced it, what test data was used, which environment it occurred in, and whether other test cases exhibit similar failures.
When you view a test case, you can see all defects ever logged against it, their current status, and which test runs they came from.
Eliminate Jira Dependency and Tool Switching
Organizations using TestFiesta with native defect tracking report eliminating their Jira dependency entirely for QA workflows. While development teams might still use Jira for sprint planning and feature tracking, QA teams no longer need licenses or access.
For teams previously spending 20-30 minutes daily on tool switching, this elimination recovers significant productive time.
But the benefits extend beyond QA. Development teams appreciate having complete context in defect reports, managers gain unified visibility, and organizations reduce tool sprawl and licensing costs.
Unified Reporting: Tests, Results, and Defects in One View
TestFiesta’s reporting brings together test execution metrics and defect data in unified dashboards. You can view quality trends over time, test coverage vs defect density, and which areas have thorough testing and low defects (mature) versus areas with fewer tests but high defect rates (need attention), resolution velocity, defect distribution, and release readiness.
These unified reports eliminate the need to export data from multiple tools and combine them in spreadsheets. Stakeholders access real-time dashboards that answer key quality questions instantly.
Faster Resolution Cycles With Context-Rich Defect Reports
TestFiesta defects include comprehensive context automatically. When a test fails and a defect is created, the platform captures complete test case details, execution environment, screenshots, and videos captured during failure. This context richness accelerates resolution because developers have everything they need to reproduce and diagnose issues immediately.
No back-and-forth asking QA for clarification, no guessing about which environment or configuration to use, no missing information that delays diagnosis. Cutting this initial delay from days to hours means defects get resolved in 3-4 days instead of 5-7 days, accelerating release cycles and improving team velocity.
Conclusion
The defect tracking approach you choose impacts your team’s efficiency, your organization’s costs, and ultimately the quality of your software. While integrated tools like Jira have dominated for years, they optimize for development team convenience at the expense of QA team productivity.
Native defect tracking flips this equation by bringing defect management directly into your test management platform. You eliminate context switching that fragments QA attention and wastes productive time, maintain workflow continuity that keeps testers focused on quality rather than administrative overhead, and capture richer context automatically, improving defect resolution speed and accuracy.
For teams frustrated with constant tool switching, native defect tracking offers a compelling alternative to traditional integrated approaches. TestFiesta's native defect tracking is designed specifically for testing workflows, not adapted from project management tools.
Frequently Asked Questions
What Is the Difference Between a Bug and a Defect?
In software testing, “bug” and “defect” are often used interchangeably, though some practitioners make subtle distinctions. A defect is any deviation from expected behavior, something that doesn’t work as specified. A bug is typically considered a specific type of defect that causes incorrect functionality or errors in the code.
Can You Do Defect Tracking Without Jira?
Absolutely. Jira is popular for defect tracking, but it’s not the only option, and for many QA teams, it’s not the best option. Several effective alternatives exist, including TestFiesta’s native defect tracking system.
What Is the Best Defect Tracking Tool for Small Teams?
For small teams (5-15 people), the best defect tracking tool balances simplicity, cost, and workflow efficiency. Native defect tracking platforms like TestFiesta excel here by keeping everything in one place without requiring extra cost or integration setups.
How Does Native Defect Tracking Differ From Integrated Tools Like Jira?
The fundamental difference is location and workflow. Integrated tools (Jira) are separate applications that connect to your test management platform via APIs. When using Jira for defects, you execute tests in one tool but must switch to Jira to create, view, or update defects. Integration maintains some connection between systems, but you still navigate two separate interfaces with different data models. Native defect tracking brings defect management directly into your test management platform. You execute tests and manage defects in the same environment, never leaving the testing interface.
Product updates
March 30, 2026
Best practices
The Testing Pyramid: A Complete Guide With Best Practices
The testing pyramid has always been a relevant model in software testing, now even more with software teams involved in complex products. Distributed architectures, continuous deployment, and automation-heavy workflows demand testing strategies that scale without breaking.
The testing pyramid has always been a relevant model in software testing, now even more with software teams involved in complex products. Distributed architectures, continuous deployment, and automation-heavy workflows demand testing strategies that scale without breaking.
The testing pyramid addresses this by organizing tests into three layers:
a broad base of fast unit tests
a middle tier of integration tests
a narrow top of end-to-end validation
This structure prevents overreliance on slow, brittle system tests while maintaining comprehensive coverage.
What Is the Testing Pyramid?
The testing pyramid is a strategy for organizing automated tests based on scope, speed, and cost. Introduced to counter excessive dependence on high-level UI testing, it recommends:
Unit tests at the base: Validate individual functions and methods in isolation
Integration tests in the middle: Verify how components interact
End-to-end tests at the top: Confirm complete workflows from the user's perspective
The principle is simple: write more tests at lower levels.
Unit tests run in milliseconds and pinpoint failures precisely, integration tests catch communication issues between services, and E2E tests validate critical paths but consume more resources and break more easily.
A well-implemented pyramid delivers:
Defects caught during development, not deployment
Lower maintenance overhead
Faster CI/CD pipelines
Reliable feedback loops
Key Characteristics of the Testing Pyramid
What makes the testing pyramid model unique is:
Scope expands upward: Unit tests examine single functions, Integration tests validate module interactions, and E2E tests simulate user behavior across the entire system.
Speed decreases upward: Unit tests execute in milliseconds, integration tests involve databases or APIs and take seconds, and E2E tests require full environments and may run for minutes.
Maintenance cost increases upward: Unit tests rarely break unless logic changes. E2E tests depend on UI stability, infrastructure configuration, and third-party services—any of which can cause failures unrelated to actual bugs.
The Three Layers of the Testing Pyramid Explained
Here is a detailed explanation of the three layers of the testing pyramid:
Unit Tests: The Foundation
Unit tests form the largest layer, validating individual functions or classes under controlled conditions. Developers write these during feature development to ensure isolated logic behaves correctly.
What they validate:
Business logic and algorithms
Input/output behavior
Edge cases and error handling
Conditional flows
Why they matter: Speed and precision. A failing unit test identifies the exact function causing the problem. Because they run quickly, they integrate seamlessly into development workflows, and developers get immediate feedback on every change. This tight feedback loop prevents defects from spreading through the codebase. Fix the issue at the source before it requires debugging across multiple layers.
Integration Tests: The Middle Layer
Integration tests verify that modules, services, or components communicate correctly. Unlike unit tests, they validate behavior across boundaries.
What they validate:
API interactions and responses
Database queries and persistence
Service-to-service communication
Data transformation across layers
Why they matter: Modern applications consist of interconnected services. Microservices, external APIs, and databases must exchange data reliably. Integration tests catch problems that unit tests cannot: schema mismatches, incorrect API contracts, and failed service handshakes. These tests are slower than unit tests but faster and more stable than E2E tests, striking a balance between coverage and execution time.
End-to-End Tests: The Top
E2E tests simulate complete user workflows, validating the system as a whole. They interact with the UI or public APIs exactly as users would.
What they validate:
Full user journeys (login, checkout, account management)
Cross-service workflows
UI behavior and rendering
System-level functionality
Why they matter: They confirm the application works in real-world scenarios. All components—frontend, backend, APIs, databases—must function together seamlessly.
The tradeoff: E2E tests are slow and fragile. UI changes, infrastructure issues, or timing problems can break them even when the underlying functionality is sound. Keep this layer small and focused on critical paths.
Benefits of the Testing Pyramid
Implementing the testing pyramid in your strategy results in several key long-term advantages.
Balanced Test Distribution
The pyramid prevents overinvestment in any single testing approach. A large base of unit tests provides rapid validation of core logic. Integration tests catch interaction failures. A small set of E2E tests confirms system-level behavior. This balance avoids two common pitfalls: testing exclusively at the unit level (missing integration bugs) or relying on E2E tests (slow, expensive, brittle).
Early Bug Detection
Most defects surface in unit tests, immediately after code is written. Developers fix issues before they propagate to other components. Integration tests then catch communication problems before system testing begins. This layered detection prevents bugs from reaching production and reduces debugging time. Finding a logic error in a unit test takes minutes. Tracking down the same issue through an E2E failure can take hours.
Faster Feedback Loops
Unit and integration tests execute quickly enough to run after every commit. Developers know within seconds whether their changes broke existing functionality. Fast feedback eliminates bottlenecks in CI/CD pipelines. Long-running E2E tests can run later in the pipeline without slowing down earlier validation stages.
Optimized Resource Allocation
Unit tests are cheap: they require no infrastructure, run in milliseconds, and rarely need updates. E2E tests are expensive: they demand full environments, UI automation tools, and constant maintenance. The testing pyramid ensures most validation happens through low-cost tests, reserving expensive E2E tests for scenarios where they provide unique value. This reduces infrastructure costs and testing overhead while maintaining coverage.
Common Challenges of the Testing Pyramid
Before you practice the testing pyramid to scale your software testing strategies, here are some common challenges to be wary of:
Ambiguous Test Classification
Without clear conventions, teams misclassify tests. A test labeled “unit” may actually depend on databases or external services, behaving like an integration test. This blurs the pyramid structure. Teams believe they have a strong unit test foundation when many tests are actually slower, more complex integration tests.
Solution: Establish naming conventions that reflect the test scope. Unit tests should never touch databases, APIs, or the filesystem.
Oversimplification for Complex Architectures
The three-tier model doesn’t always map cleanly to modern systems. Microservices, asynchronous workflows, and API-heavy architectures introduce testing layers that fall between traditional categories.
API contract testing, service virtualization, and component testing may require their own strategies. The pyramid provides a framework, not a rigid rulebook.
Solution: Adapt the model to your architecture. Add layers if needed, but maintain the core principle: more fast tests, fewer slow tests.
Test Maintenance Burden
As applications evolve, tests require updates. UI changes break E2E tests. API modifications fail integration tests. Refactored code invalidates unit tests. Without regular maintenance, test suites become unreliable. Teams ignore failures or spend excessive time updating tests instead of building features.
Solution: Treat tests as production code. Refactor regularly, eliminate duplication, and delete obsolete tests.
Flaky Tests
Flaky tests pass sometimes and fail others without code changes. They erode trust in automation and waste time.
Common causes of flaky tests include:
Network instability in integration tests
Timing issues in E2E tests
Dependencies on external services
Non-deterministic code (random data, timestamps)
Solution: Isolate flaky tests immediately. Fix or remove them before they spread. Use stable selectors in UI tests, mock external dependencies, and implement proper wait strategies.
Environment Configuration
Integration and E2E tests require realistic environments. Databases, authentication services, message queues, and APIs must be configured correctly. Inconsistent environments cause tests to fail unpredictably. A test that passes locally may fail in CI due to missing dependencies or incorrect configuration.
Solution: Use containerization (Docker) or infrastructure-as-code to ensure consistent, reproducible environments. Automate environment setup as part of the test pipeline.
The Testing Pyramid in Agile and DevOps
Agile development integrates testing throughout the development cycle rather than treating it as a final phase. Teams write tests alongside code, running them continuously to catch issues early. Automation enables this approach.
Without fast, reliable tests, continuous integration breaks down. The testing pyramid provides the structure agile teams need: fast tests for immediate feedback, broader tests for integration confidence, and targeted E2E tests for release validation.
How Does Shift-Left Testing Apply to the Testing Pyramid?
Shift-left testing moves validation earlier in the development lifecycle. Instead of testing after coding completes, teams test during design, development, and code review.
Applied to the pyramid, shift-left means:
Writing unit tests before or immediately after implementing features
Running integration tests during feature development
Catching issues in code review, not in staging environments
This approach reduces the cost of fixing defects. A bug caught in a unit test costs minutes to fix. The same bug discovered in production costs hours or days.
Shared Responsibility
Agile teams share ownership of quality. Developers write unit and integration tests. QA engineers focus on exploratory testing, complex scenarios, and E2E validation. DevOps engineers ensure test environments and pipelines run reliably. This collaboration prevents quality from becoming a bottleneck. Everyone contributes to test coverage, and no single role gates releases.
Evolution Beyond the Classic Pyramid
Some teams adopt alternative models: the Testing Trophy (emphasizing integration tests), the Testing Diamond (balancing integration and E2E tests equally), or custom structures reflecting their architecture. These variations share the same principle: structure tests intentionally based on speed, cost, and scope. The specific shape matters less than the underlying discipline.
The Testing Pyramid Best Practices
When adopting the testing pyramid in your workflow, here are some best practices to follow:
Unit Testing
Some best practices for unit testing are:
Keep tests isolated: Unit tests should never depend on databases, APIs, or external services. Use mocks or stubs for dependencies. Tests that require infrastructure belong in the integration layer.
Run tests frequently: Unit tests should execute after every code change. Keep them fast enough to run in seconds, not minutes.
Write tests during development: Don’t defer testing. Write tests as you implement features, or adopt test-driven development (TDD) to write tests first.
Make failures obvious: Test names should clearly describe what they validate. When a test fails, developers should immediately understand what broke.
Integration Testing
Here are a few key steps for integration testing:
Focus on critical interactions: Don’t test every possible combination of components. Identify the most important service communications—API calls, database queries, message exchanges—and validate those.
Use stable environments: Integration tests require consistent dependencies. Use containers, mock services, or controlled test data to eliminate environmental variability.
Provide clear diagnostics: When an integration test fails, the error message should identify which service or interaction caused the problem. Vague failures waste debugging time.
End-to-End Testing
Some best practices for end-to-end testing:
Limit scope to critical workflows: E2E tests are expensive. Focus on high-value paths: user registration, checkout, core product functionality. Don’t replicate unit or integration test coverage at the E2E layer.
Build resilient tests: Use stable element selectors, implement proper wait strategies, and design tests to tolerate minor UI changes. Fragile tests create maintenance overhead and erode trust.
Run strategically in pipelines: Execute E2E tests at later pipeline stages, not on every commit. Let unit and integration tests provide fast feedback while E2E tests validate releases.
Bring Your Testing Pyramid to Action in TestFiesta
TestFiesta provides the infrastructure to implement the testing pyramid effectively across all three layers.
Streamlined Workflows: Centralized test repositories, rapid execution, and real-time reporting help catch issues immediately, which is particularly helpful in unit testing.
Efficient Integration Testing: Comprehensive collaboration, flexible testing environments, and detailed test plans, test runs, and milestones ensure reliable validation of each feature.
Targeted E2E Testing: TestFiesta enables cross-browser support and strategic CI/CD integration that prevents pipeline slowdowns for E2E testing.
Analytics and Continuous Improvement: Visualize coverage across the pyramid, track flaky tests, and identify gaps. Shared dashboards give teams visibility into test health and progress.
TestFiesta combines speed, reliability, and actionable insights to help teams maintain fast feedback loops, strong coverage, and confident releases.
Conclusion
The testing pyramid structures automated testing for speed, reliability, and cost-efficiency. A strong foundation of unit tests provides immediate feedback. Integration tests validate component interactions. A small layer of E2E tests confirms critical workflows.
In agile and DevOps environments, the pyramid enables early bug detection, faster releases, and shared ownership of quality. Challenges like flaky tests and environment complexity are manageable with disciplined practices and the right tools.
It’s a practical framework for building maintainable, scalable software. Teams that apply it consistently deliver reliable applications faster, with less friction and greater confidence.
FAQs
What is the QA testing pyramid in software testing?
The QA testing pyramid in software testing is a framework that organizes automated tests into three layers: unit tests (base), integration tests (middle), and E2E tests (top). It emphasizes faster, more reliable tests at lower levels and fewer complex tests at higher levels.
Why should agile teams use the testing pyramid?
Agile teams should adopt the testing pyramid because it aligns with iterative development by enabling continuous testing. Fast unit tests catch defects during development, while integration and E2E tests validate broader functionality without slowing delivery.
What does the test pyramid emphasize?
The testing pyramid emphasizes speed, reliability, and efficiency. It suggests that most tests should fall under fast unit tests, integration tests should validate interactions, and E2E tests should focus on critical workflows. This structure maximizes feedback speed while minimizing cost.
What is pyramid automation?
Pyramid automation refers to automating tests according to pyramid principles: extensive unit test automation for rapid feedback, integration test automation for component validation, and targeted E2E automation for critical paths.
Do the layers in the testing pyramid overlap?
Yes, some overlap occurs in the testing pyramid, especially between integration and E2E tests. While overlap isn’t necessarily an issue, the key is avoiding redundant coverage, ensuring each test validates something unique to its layer.
Which is the most important layer of the testing pyramid?
The unit test layer can be considered the “most important” layer of the testing pyramid. It provides the foundation, catches most defects early, runs fastest, and costs least to maintain. However, all three layers are necessary for comprehensive validation.
Best practices
March 25, 2026
Testing guide
Black Box vs White Box Testing: A Complete Guide
When people talk about software testing, one of the most common distinctions you’ll hear is black box testing vs white box testing. One approach focuses on testing software from the outside, while the other examines how the system works internally. But in practice, it’s not that simple. The relationship between the two is more nuanced than most think.
When people talk about software testing, one of the most common distinctions you’ll hear is black box testing vs white box testing. One approach focuses on testing software from the outside, while the other examines how the system works internally. But in practice, it’s not that simple. The relationship between the two is more nuanced than most think.
Both approaches exist to answer the same fundamental question: Does the software work as expected? The difference lies in how testers approach the problem. Think of it like inspecting a car: one person checks if it drives smoothly, while another pops the hood to inspect the engine.
In this guide, we’ll break down the key differences between black box and white box testing, explore when each approach works best, and explain how they complement each other in real-world testing strategies.
What Is Black Box Testing
Picture yourself as a user. Clicking buttons, filling out forms, watching what happens next. That’s black box testing in a nutshell. You’re evaluating an application’s functionality without examining its internal code, structure, or implementation. The focus is entirely on inputs and outputs. You provide input to the product and observe its response. If the output matches the expected result based on requirements, the test passes.
Why is this valuable? Because it simulates how real users actually interact with software. This makes it especially useful for validating user-facing features and workflows. Testers rely on requirements, specifications, and user stories to design their test cases. And here’s a key advantage: since black box testing doesn’t require programming knowledge, it can be performed by QA engineers, testers, or even stakeholders in some cases.
Types and Techniques of Black Box Testing
Black box testing encompasses several testing types and techniques, each designed to validate software behavior from an external perspective.
Functional Testing: Does each application feature work as specified? Functional testing answers that question by having testers provide inputs and check whether the outputs match the expected results. It’s about verifying the “happy path” and expected user workflows.
Non-Functional Testing: What about performance, reliability, scalability, and response time? These elements aren’t tied to specific features but absolutely impact user experience. Non-functional testing evaluates aspects like how fast the system responds under load, whether it remains stable, and how well it scales.
Regression Testing: When you release an update or fix a bug, something unexpected can break. Regression testing prevents this by re-running existing test cases to confirm that recent changes haven’t introduced new defects. It’s your safety net after deployments. (This is especially important in continuous development cycles, similar to validating core functionality with smoke testing.)
UI Testing: Users interact with buttons, menus, forms, and layouts. UI testing ensures these visual elements behave as expected and remain consistently functional across interactions.
Usability Testing: Usability testing uncovers whether the app feels intuitive and whether users can easily navigate it. Testers observe how actual users interact with the software and identify confusion points and difficulty areas, directly improving the user experience and reducing the learning curve.
Ad Hoc Testing: Sometimes the best bugs are found by exploration rather than planning. Ad hoc testing is an informal approach that explores the application for unexpected defects without predefined test cases. The goal is to discover bugs through spontaneous testing and creative exploration without structured requirements.
Compatibility Testing: Your app needs to work across different devices, operating systems, browsers, and environments. Compatibility testing verifies exactly that, ensuring users receive a consistent experience whether they’re on Chrome, Safari, Android, or iOS.
Penetration Testing: Penetration testing simulates cyberattacks to identify security vulnerabilities. Security testers attempt to exploit weaknesses, providing teams with the information needed to strengthen defenses before real attackers find these gaps.
Security Testing: Beyond penetration testing, security testing ensures that the application protects data and prevents unauthorized access. It verifies mechanisms like authentication, authorization, encryption, and data protection. The objective is to identify and fix potential security risks.
Localization and Internationalization Testing: If your product was made in the US, would it work for users in Japan? Germany? Brazil? This testing verifies that applications function correctly across different languages, regions, and cultural settings. It checks translations, date/time formatting, currency displays, and cultural nuances.
What Is White Box Testing
Now flip the perspective. Instead of clicking buttons like a user, imagine being the developer. You’re inside the system, analyzing the internal structure, logic, and code of an application to verify it works correctly. That’s white box testing.
Unlike black box testing — which focuses only on inputs and outputs — white box testing requires understanding how the software is implemented. Testers analyze the code, control flow, and data paths to ensure every part of the program behaves as expected.
Who does this? Developers or testers with programming knowledge, because it involves reviewing and testing the application’s internal logic. By inspecting how code executes, white box testing uncovers issues that remain invisible from the outside: logical errors, security vulnerabilities, inefficient code paths, and hidden defects.
Types and Techniques of White Box Testing
White box testing employs several techniques to analyze internal logic and code structure.
Unit Testing: Starting small, unit testing verifies the smallest components of a program, such as functions, methods, and individual classes. Each unit gets tested independently to ensure it performs its intended task correctly. Developers typically write these tests during development.
Static Code Analysis: You don’t always need to run code to find problems. Static code analysis is like a spell-checker for code. In this analysis, testers examine the source code without executing the program. Tools and manual reviews detect coding issues like syntax errors, security vulnerabilities, and code standard violations.
Dynamic Code Analysis: Some issues only appear when the code runs. Dynamic code analysis evaluates software behavior while it executes. Testers observe how the code runs and check for runtime errors, memory leaks, and performance issues that static analysis might miss.
Statement Coverage: Did your tests actually exercise every line of code? Statement coverage measures whether each line has been executed during testing. The goal is to ensure every statement gets tested at least once, helping identify untested code paths that might harbor hidden defects.
Branch Testing: Code expands into branches when decisions happen, including if statements, else clauses, and switch cases. Branch testing verifies that every possible branch is executed. This includes testing both true and false outcomes of conditional statements, ensuring all decision paths work correctly.
Path Testing: Beyond branches, entire execution paths also matter. Path testing involves executing different possible paths through the program’s control flow. Testers analyze the application logic to ensure all meaningful execution paths are covered, not just individual branches.
Loop Testing: Loops repeat operations, and loop testing validates how loops behave across different iteration counts, including for loops, while loops, and do-while loops. In other words, it includes testing boundary conditions: what happens when a loop runs zero times, once, and many times?
Key Differences in Black Box and White Box Testing
Here’s how these two approaches compare:
Aspect
Black Box Testing
White Box Testing
Definition
Tests the functionality of software without examining the internal code or structure.
Tests the internal logic, structure, and code of the application.
Focus
Focuses on inputs, outputs, and user behavior.
Focuses on code paths, logic, and internal implementation.
Knowledge of Code
No knowledge of source code is required.
Requires understanding of the code and programming logic.
Who Performs It
Usually performed by QA testers, test engineers, or end users.
Often performed by developers or testers with programming knowledge.
Testing Level
Commonly used in system testing, functional testing, and acceptance testing.
Commonly used in unit testing and integration testing.
Test Design Basis
Based on requirements, specifications, and user expectations.
Based on code structure, algorithms, and internal design.
Techniques Used
Techniques include equivalence partitioning, boundary value analysis, and exploratory testing.
Techniques include statement coverage, branch coverage, path testing, and loop testing.
Defects Found
Identifies missing functionality, incorrect outputs, and usability issues.
Identifies logical errors, security vulnerabilities, and inefficient code paths.
Viewpoint
Tests the application from the user’s perspective.
Tests the application from the developer’s perspective.
Main Goal
Ensure the software behaves correctly for users.
Ensure the internal code functions correctly and efficiently.
Key Similarities in Black Box and White Box Testing
Different as they seem, black box and white box testing share fundamental ground. Both exist to ensure the application functions correctly and reliably. Both improve software quality and play important roles in comprehensive testing strategies. Here’s where they overlap:
Improve Software Quality: The primary goal of both approaches is to identify defects and ensure the application behaves as expected. They help teams deliver reliable and stable software. Neither exists in isolation; they’re two perspectives on the same mission.
Part of a Broader Testing Strategy: Black box and white box testing rarely work alone. Modern teams use them together within a comprehensive testing strategy. Combining both perspectives helps teams detect issues at both the functional and code levels.
Require Thoughtful Test Design: Whether you’re testing from outside or inside, effective testing requires carefully designed test scenarios and test cases. Proper planning ensures meaningful coverage and accurate results. Sloppy test design wastes time regardless of the approach.
Catch Different Defects: Black box testing finds missing functionality and usability problems. White box testing catches logical errors and security vulnerabilities. Each method contributes unique insights during development, and detecting defects early reduces the cost and effort required to fix them later.
Support Automation: Modern testing tools enable both approaches to be automated. Teams can run automated black box tests for regression testing and automated unit tests (white box) in CI/CD pipelines. Automation helps teams run tests frequently and maintain quality throughout continuous development cycles.
Inform Release Decisions: The insights gained from these testing methods help teams evaluate product readiness. Test results provide valuable information for deciding whether software is ready for deployment. Leadership needs both perspectives before green-lighting a release.
Real-World Applications of Black Box Testing
Black box testing is widely used across industries because it focuses on validating software behavior from the user’s perspective. By testing inputs and outputs without examining internal code, teams ensure applications function correctly in real-world scenarios.
Web Application Testing
Testing a website? Start with black box testing. Testers interact with features like login forms, search functions, checkout processes, and navigation menus to ensure they work correctly for users. This confirms that the application behaves as expected across different scenarios.
Mobile Application Testing
Mobile apps depend heavily on black box testing to validate user interactions, gestures, and interface behavior. Testers check features like registration, notifications, payment flows, and app navigation without analyzing underlying code. This ensures the app delivers a smooth and reliable user experience.
API Testing
APIs power modern applications, and black box testing validates APIs by sending requests and analyzing responses. Testers verify whether the API returns correct data, proper status codes, and meaningful error messages based on different inputs. This ensures backend services communicate properly with applications and external systems.
E-commerce Platform Testing
Online stores require extensive black box testing to ensure critical user journeys work properly. Testers validate processes like browsing products, adding items to a cart, applying discounts, and completing payments. One glitch in checkout? That’s lost revenue. Black box testing prevents these costly mistakes.
Banking and Financial Applications
Financial systems can’t afford failures. Black box testing verifies transaction workflows and account management features. Testers validate operations like fund transfers, balance checks, and payment processing to ensure they produce correct results. This is essential for maintaining accuracy and trust in financial applications.
Enterprise Software Testing
Large enterprise applications like CRM or ERP systems require extensive black box testing to validate business workflows. Testers verify that processes like data entry, reporting, and system integrations function correctly from the user’s perspective. When a company relies on your software for daily operations, reliability isn’t optional.
White box testing validates the internal logic and structure of software systems. By examining the underlying code, developers and testers ensure algorithms, control flows, and data handling processes function correctly. This approach proves especially valuable in complex applications where reliability, performance, and security are essential.
Unit Testing in Software Development
White box testing begins early, during unit testing, where developers verify individual components. Developers examine the internal logic of functions, classes, or modules to ensure they produce correct results under different conditions. This catches logical errors early in the development process, before code reaches integration testing.
Code Optimization and Performance Improvement
Want faster, cleaner code? Developers use white box testing to analyze execution efficiency. By reviewing loops, conditions, and execution paths, they identify inefficient operations or redundant logic. This improves overall performance and maintainability.
Security and Vulnerability Detection
White box testing uncovers security weaknesses within the code itself. Testers analyze authentication mechanisms, data handling, and input validation to detect vulnerabilities that attackers might exploit. This is particularly important for applications handling sensitive data.
Database and Data Flow Validation
Applications handling heavy data processing benefit greatly from white box testing. Testers analyze queries, data transformations, and validation logic to ensure information is processed accurately.
Testing Complex Algorithms and Business Logic
Applications relying on advanced algorithms, such as financial calculations, recommendation engines, and machine learning models, need white box testing. Testers evaluate the internal logic to ensure algorithms produce correct results in all scenarios. Mathematical errors in a pricing algorithm affect thousands of users.
Continuous Integration and Automated Testing Pipelines
White box testing integrates directly into automated testing pipelines within CI/CD workflows. Developers run unit tests and code analysis tools whenever new code is added to the repository. This maintains code quality and detects issues before they reach production. Every commit triggers validation.
How Does TestFiesta Support Black Box Testing vs. White Box Testing
Modern testing teams use both approaches to evaluate software from different perspectives. A flexible test management platform helps organize, track, and execute these different testing approaches within a single workflow. TestFiesta supports both methods by providing tools for test case creation, execution tracking, automation integration, and reporting. This allows QA teams and developers to manage all testing activities in one place.
Supporting Black Box Testing
Black box testing focuses on validating how software behaves from the user’s perspective. TestFiesta helps teams manage these tests by organizing functional and user-driven scenarios clearly and efficiently.
Requirement-Based Test Case Management: TestFiesta enables requirement-based test case management. QA teams create test cases directly from user stories, acceptance criteria, or product requirements. This approach makes it easier to verify that features behave correctly without needing access to the underlying code. Your test cases align with business requirements, not implementation details.
Reusable Test Steps for Common Workflows: Shared steps in TestFiesta allow teams to reuse common actions, such as login flows, checkout processes, and data entry patterns, across multiple tests. Updating the shared step automatically updates all related tests, reducing maintenance effort. You write the logic once; it scales across dozens of tests.
Structured Test Suites and Execution Tracking: TestFiesta lets testers organize functional tests into suites, track execution results, and monitor pass/fail rates. This helps teams quickly assess whether the application behaves as expected. See at a glance: which features pass, which fail, and where gaps exist.
Clear Reporting and Visibility: Custom dashboards and reports provide insights into test coverage, execution progress, and defects. This visibility helps stakeholders understand how well user-facing functionality is validated.
Supporting White Box Testing
White box testing focuses on validating internal code quality and logic. TestFiesta integrates with automation tools and CI/CD pipelines to support these efforts.
Automation Integration: TestFiesta connects with unit testing frameworks and code analysis tools, allowing teams to track automation results alongside manual tests. Unit tests run automatically; results flow into TestFiesta dashboards.
Defect Tracking and Metrics: When unit tests or code analysis uncover issues, TestFiesta captures them as defects, which can be tracked right inside TestFiesta or through a third-party platform like Jira. Development teams track fixes and correlate code quality improvements with testing efforts.
Conclusion
Black box testing and white box testing represent two different but complementary approaches to software quality assurance. Black box testing focuses on validating the application from the user’s perspective. White box testing examines the internal logic and structure of the code. Each method uncovers different types of defects, making them both valuable in a well-rounded testing strategy.
Rather than choosing one over the other, modern software teams benefit from using both approaches together.
By organizing test cases, tracking execution results, and integrating automated tests, tools like TestFiesta help teams manage both testing approaches more effectively. This unified view allows developers and QA teams to collaborate more efficiently and maintain high software quality throughout the development lifecycle.
FAQs
How does white box testing differ from black box testing?
White box testing and black box testing differ mainly in visibility into the software’s internal structure. In black box testing, testers evaluate the application by providing inputs and verifying outputs without looking at the underlying code. White box testing involves analyzing internal logic, structure, and code paths to ensure the software behaves correctly. Black box testing focuses on user-facing functionality; white box testing validates internal implementation.
Should I use black box testing or white box testing?
In most cases, you shouldn’t choose one over the other. Both approaches serve different purposes and are most effective when used together. Black box testing validates how the application behaves from a user’s perspective, whereas white box testing ensures the internal code works correctly. Combining both approaches gives teams more complete testing coverage.
Which testing type is best for my software?
There is no single “best” software testing type for all software projects. The right approach depends on factors like system complexity, development process, and risks involved. Most modern teams use a mix of testing methods, including black box, white box, and automated testing, to ensure both functionality and code quality are thoroughly validated.
How should I evaluate my needs and goals for an ideal software testing type?
Start by considering your product’s requirements, risk level, and development workflow. If validating user behavior and functionality is your focus, black box testing plays a larger role. If you need to verify internal logic, security, or performance at the code level, white box testing becomes more important. Many teams adopt a balanced strategy incorporating multiple testing techniques to achieve broader coverage.
Can I do both black box testing and white box testing at the same time?
Yes, and many teams do exactly that. Black box testing and white box testing can run in parallel during different development stages. Developers perform white box testing through unit tests and code analysis. Simultaneously, QA teams conduct black box tests to validate features and workflows. Running both simultaneously helps teams detect issues earlier and maintain higher software quality.
What is grey box testing?
Grey box testing is a hybrid approach combining elements of both black box and white box testing. Testers have partial knowledge of the system’s internal structure but still test the application from an external perspective. This allows testers to design more informed test cases while still focusing on real user scenarios.
What’s the difference between black box, white box, and grey box testing?
The main difference lies in how much knowledge the tester has about the software’s internal structure. Black box testing gives the tester no visibility into the code; the focus remains on inputs and outputs. White box testing gives testers full knowledge of internal code and validation of the program’s logic and structure. Grey box testing sits in between: testers have some understanding of system internals, but primarily test the application from a user-facing perspective.
Testing guide
January 16, 2026
QA trends
14 Best Test Management Tools in 2026: (Free & Paid)
As we enter 2026, software products are becoming more advanced and complex. Extensive integrations and high functionalities in practically every product may be appealing to users, but things on the testing side are yet to advance. The QA labor is stuck with lookalike features across all testing tools, and behind the scenes is cluttered and rigid. We realized that the gap between “good enough” and “actually improves your QA process” is wider than ever. This guide cuts through the noise. We’ve rounded up the 14 best test management platforms that are genuinely worthwhile for QA teams looking for a permanent fix this year.
As we enter 2026, software products are becoming more advanced and complex. Extensive integrations and high functionalities in practically every product may be appealing to users, but things on the testing side are yet to advance. The QA labor is stuck with lookalike features across all testing tools, and behind the scenes is cluttered and rigid. We realized that the gap between “good enough” and “actually improves your QA process” is wider than ever. This guide cuts through the noise. We’ve rounded up the 14 best test management platforms that are genuinely worthwhile for QA teams looking for a permanent fix this year.
A Quick Overview of Best Test Management Tools for 2026
What Are Test Management Tools and Why Do They Matter?
Test management tools are software solutions that help teams create, plan, organize, and track test cases for QA testing. Behind every functional software product, there’s a large number of test cases that have to “pass” before the product goes live. These test cases can easily hit the million mark for some big and versatile products, and managing them isn’t easy.
A test management tool offers a centralized platform for QA teams to manage test cases, conduct execution, track bugs, and report progress. The most important function of a test management tool is that it cuts down days of work into hours and hours into minutes, all while offering traceability of each test case for quality assurance.
The general criteria for a good test management tool focus on the tool’s ability to help teams:
Organize and manage test cases, runs, and results through a centralized platform
Improve communication between QA, dev, and marketing teams
Reduce duplication and streamline tasks
Trace requirements, test cases, and defects easily
Check and download real-time, customizable reports for better decision-making
Scale with evolving teams and keep up with agile development
Ensure quality and consistency across every release
Key Features to Look for in Test Management Software
Before we explore each test management tool in detail, let’s see what a good set of features looks like in a test management tool.
Centralized Repository
Test management tools come with a centralized repository where all your progress is stored. A centralized repository is a unified hub where you can create, organize, and manage test cases, making it easier to find or reuse test cases instead of wasting time looking for them or recreating them from scratch.
Test Planning
With test management tools, you create test plans that outline your overall testing strategy. Test planning helps you build a roadmap that includes various aspects of the testing process, including selecting which test cases to execute, assigning responsibilities across your team, and scheduling test runs for specific cases.
Test Execution
You can execute tests reliably inside a test management tool. These tools enable testers to run tests, record results, and log any defects that they encounter during testing. Basically, test execution streamlines your testing process by helping you identify and address issues quickly, reducing the time it takes to build a high-quality release.
Progress Tracking
One of the prominent features of test management tools is that you can track your testing progress easily inside the tool. Testers can monitor the status of their test execution, track defects, and generate comprehensive real-time reports, all from an inclusive dashboard, which offers clear visibility into the testing progress.
Traceability
Traceability refers to the ability to track software requirements across different stages of the development lifecycle. Ideally, each requirement of your product should have a corresponding test case; test management tools can make it happen. Inside a tool, you can also track each test case and find out if it fulfills the requirement, which consequently allows you track the changes throughout the development process.
Visibility and Organization
Visibility and organization are core features of any test management system. It’s how you manage your test cases and get the work done. Countless good features go to waste if they are not properly visible to the users. However, each tool has its own way to offer visibility and abilities to organize test cases. How many folders can you make, where you can see them, how many search filters you can place, what tags can be used, if any, are all solid questions that determine how much visibility and organization a tool provides.
Collaboration
A prominent advantage of using a test management tool is collaboration; it provides a centralized platform for test documentation that team members can collaborate on easily. You could see which team member is working on which test case, and share any test artifacts with our colleagues. The overall purpose of collaboration is to work together and achieve better results.
Integrations
In addition to a test management system, software testing relies on various other tools. A good test management tool allows you to integrate other tools with your platform. These could be bug-tracking systems, version control systems, and CI/CD pipelines. Your workflow stays streamlined through your test management tool, and you can access necessary tools from a single interface.
Reporting
We talked about progress tracking, about how you can access all the relevant KPIs in your test management tool’s dashboard. Reporting takes this a step further and allows you to download customized reports for your stakeholders. In a tool like TestFiesta, you can download reports in various formats and showcase various metrics that help you make key decisions.
Compliance
Test management tools document test processes, results, and approvals for each test case, which is how testers can establish compliance with regulatory standards and keep audit logs. Since everything is tracked, documented, and accounted for, teams have ownership over processes.
Test Case Versioning
As you make changes in the test cases over time, you create a history of edits, which includes who made the changes, what the changes were, and when the changes were made. These are called “versions,” and test case versioning is a key feature of test management tools. This feature not only allows testers to revert to previous versions if necessary, but it also ensures transparency and accountability in the process, which is vital in auditing.
Data Management
Data management in test management refers to ensuring that test data remains updated, secure, and relevant. Test management tools vary in their versatility related to data management, but most tools offer some features that allow testers to create and maintain data sets, masking sensitive data, and securing data integrity throughout the testing process.
14 Best Test Management Tools for Software Testing in 2026: A Detailed Comparison
After careful review and a lot of testing, this section breaks down 14 tools that consistently perform well in real-world QA environments. You’ll find what each platform does best, where it may fall short, and the kind of teams that they are most suited for. Skip the endless demos and sales pitches; read this guide till the end, and make an informed decision.
1. TestFiesta
TestFiesta is a comprehensive, flexible, AI-powered test management platform designed to simplify and streamline how QA teams organize, execute, and report on software testing. Built by QA professionals for QA professionals, it delivers the flexibility, speed, and modern workflows that agile teams demand, without the complexity, rigid structures, or inflated pricing of legacy tools.
Unlike legacy tools built by large enterprises and holding companies that force teams into rigid structures, TestFiesta is built by a team of QA testers with 20 years of experience in test management. Unlike popular test management tools that have lookalike features, TestFiesta prioritizes flexibility in workflows through intuitive interfaces and modular elements, letting testers perform more actions in fewer clicks.
It’s ideal for teams that want a flexible QA process with a scalable platform that supports dynamic processes as operations grow. The best thing about TestFiesta is that your cost per person and your access to all features remain the same regardless of how big your organization gets, which is something that most tools miss out on.
Flexible Test Management: TestFiesta boasts “true” flexibility with its intuitive interface and easy navigation. You exactly know where everything is, and you get there with fewer clicks. This modular system gives you far more control and visibility than the rigid setups used in most other tools.
AI Test Case Creation: TestFiesta’s built-in AI Copilot gives users AI-powered assistance throughout the entire testing process. From test case creation to ongoing refinement and management, the AI Copilot acts as a qualified assistant at every step.
Customizable Tags: Every entity in TestFiesta, including users, test cases, runs, plans, milestones, and more, can be tagged. You can create tags for anything you care about and apply them anywhere. And they are not just labels; they reflect how you search, customize, organize, and report inside the platform.
Configuration Matrix: A Configuration Matrix in TestFiesta is built to support an unlimited number of testing environment details. It allows you to quickly duplicate test runs across hundreds of unique environment combinations (e.g., Safari on iPhone 16 running iOS 26). You can fully customize which configurations are relevant for your testing needs, and apply them to any run. This dramatically reduces test setup time and ensures every scenario is covered, with no manual duplication or missed combinations.
Reusable Configurations: TestFiesta’s Reusable Configurations let you define environment settings once and apply them everywhere — across test cases, runs, and projects. Clone, edit, or version configurations as your environment evolves, and instantly scale test coverage to new platforms, devices, or customer requirements.
Shared Steps to Eliminate Duplication: In TestFiesta, common steps can be created once and reused across multiple test cases. Any updates made to a shared step reflect everywhere it’s used, saving hours of editing. Steps can be nested, versioned, and assigned owners, and usage analytics will show which steps are most reused, helping teams optimize and maintain their libraries.
Custom Fields: Custom Fields in TestFiesta let you capture any data you need at the test case, run, or result level. Fields can be required, optional, or conditional (e.g., only show if a certain status is selected). Use custom fields for integrations (mapping to Jira fields), reporting, workflow automation, or regulatory compliance. Every field is fully searchable and reportable, so you can analyze and filter by any dimension that matters to your team.
Automation Integrations: Along with integration to testers’ favorite issue trackers, TestFiesta also allows you to build custom automations and connect with your CI/CD pipeline through a comprehensive API.
Folders: Folders give you the flexibility to store your test cases the way you want to see them. With an easy drag-and-drop function, you can nest each case however you want, wherever you want.
Detailed Customization and Attachments: Testers can attach files, add sample data, or include customization in each test case to keep all relevant details in one place, making every test clear, complete, and ready to execute.
Instant Migration: Teams often do not switch from rigid, legacy tools because they value their data more than the opportunity to switch to a better tool. TestFiesta solves this problem by allowing users to import their data from any test management platform and continue testing. For TestRail users, TestFiesta has an API that allows migration within 3 minutes. All the important pieces come with you: test cases and steps, project structure, milestones, plans and suites, execution history, custom fields, configurations, tags, categories, attachments, and even your custom defect integrations.
Fiestanaut: TestFiesta offers an AI-powered chatbot, Fiestanaut, just a click away, so teams are never left guessing. Fiestanaut provides quick answers and guidance, particularly helping teams navigate the tool. Support teams are also always just a touchpoint away for when you need a real person to step in.
Pricing
TestFiesta’s pricing is very transparent and probably the most straightforward pricing among all currently available platforms.
Free User Accounts: Anyone can sign up for a free account and access every feature individually. It’s the easiest way to experience the platform solo. The only exception in free accounts is the ability to collaborate.
Organization: In $10 per active-user per month, teams unlock the ability to work together on projects and collaborate seamlessly. No locked features, no tiered plans, no “pro” upgrades, and no extra charges for essentials like customer support. Regardless of how big your organization is, your price per user remains the same.
Ideal for
TestFiesta is ideal for the following teams:
New, intermediate, and experienced QA testers
Looking for a modern, lightweight test management tool
Want a more straightforward but feature-rich test management approach
Tired of legacy tools, poor UIs, and lazy customer support in other tools (easy migration makes switching super easy)
Want to reduce testing costs or have smaller budgets
Looking for custom automation integrations
2. TestRail
TestRail is one of the most widely used test management tools, known for its structured approach to test case organization and execution. It allows teams to manage test plans, runs, and milestones with a high level of customization. Strong reporting and analytics features help QA leads track coverage, progress, and trends over time. TestRail integrates with a wide range of issue trackers, automation frameworks, and CI tools. While powerful, its interface and configuration options can feel heavy for most teams. It’s best suited for teams that value detailed documentation, structured interfaces, and formal testing processes.
Key Features
TestRail is most popularly known for the following features:
Comprehensive test management: Manage test cases, suites, and test runs within an optimized structure.
Real-time insights into your testing progress: with advanced reports and dashboards, TestRail makes traceability readily available.
Scalability: Helps you manage important data and structures, such as project milestones, and makes it easy to integrate with bug tracking tools.
Pros
Some key advantages of TestRail include:
Mature and widely trusted
Strong reporting and analytics
Strong integration ecosystem
Helpful for structured QA
Supports large test libraries
Cons
TestRail has its fair share of drawbacks, including:
Clunky, dated UI that makes test management harder than it needs to be
Steep initial learning curve
Setup and configuration can take time
Pricing is too high for small teams
Exploratory testing support is weaker
New updates and releases introduce bugs
No free plan
Pricing
TestRail does not have a free plan. Their pricing is divided into two tiers:
Professional: $40 per seat per month
Enterprise: $76 per seat per month (billed annually)
Ideal for
TestRail is ideal for:
Medium to large QA teams
Organizations needing structured documentation
Teams with complex test plans
Enterprise workflows and formal QA processes
3. Xray
Xray is a test management tool built directly into Jira, treating tests as native Jira issues. This approach provides strong traceability between requirements, test cases, executions, and defects. Xray supports manual testing, automation, and BDD frameworks. Because it resides within Jira, teams can manage testing without switching tools; however, the setup and learning curve can be steeper than those of most standalone platforms. Overall, Xray is ideal for teams deeply invested in the Atlassian ecosystem.
Key Features
Key features of Xray include:
Native test management: Built for Jira-driven teams and treats test cases as native Jira issues.
AI guidance: Supports all-in-one test management, guided by AI.
Reports and requirement coverage: Offers interactive charts for teams to view test coverage of requirements.
Integrations: Integrates with automation frameworks, CI & DevOps tools, REST API, and BDD scenarios inside Jira.
Pros
Xray’s key advantages include:
Deep Jira ecosystem integration
No context-switching for Jira users
Extensive integration with automation tools
Offers in-depth reporting and visibility
Cons
Some drawbacks of Xray are:
Requires Jira (no standalone); Jira UI also provides constraints
Teams require advanced editions for more storage
Workflow complexity may grow over time
Pricing keeps increasing as you add more users
Pricing
Xray offers a free trial with two tiers:
Standard (essential features): $10 per month for the first 10 users; the price per user starts increasing after the 10th user.
Advanced (all features): $12 per month for the first 10 users; the price per user starts increasing after the 10th user
Ideal for
Xray is ideal for:
Teams fully using Jira
Agile squads with Jira backlogs
Teams requiring extensive integration with automation tools
Organizations standardizing on Atlassian tools
DevOps teams tied to Jira workflows
Small to large Jira-centric teams
4. TestLodge
TestLodge is a frictionless test management tool built for QA teams that prioritize simplicity and speed over heavy, bloated features. It centralizes test plans, requirements, test cases, and runs into a clean, lightweight workspace designed to get teams up and running instantly. A major differentiator is its pricing model; by offering flat monthly rates with unlimited user accounts, it provides a cost-effective solution for growing teams. While it keeps core testing simple, TestLodge integrates seamlessly with popular issue trackers like Jira, Trello, and Linear, allowing teams to log defects and sync ticket statuses directly from active test runs without switching tools.
Key Features
TestLodge’s core features include:
Test case management: Create and organize test cases with an easy-to-manage system.
Test execution: Run tests with guided workflows.
Requirement linking: Associate requirements to test cases and view traceability reports.
Issue tracker integrations: Automate defect raising and synchronize ticket statuses when a test fails.
Pros
Some good highlights include:
Lightweight, easy-to-use interface
SOC 2 and GDPR compliant
No per-user pricing (cost-effective for growing teams)
Strong integrations with popular issue trackers
Quick setup and low learning curve
Suitable for teams and companies of all sizes
Cons
Why users might skip TestLodge:
If users prefer more customization
No permanent free level (trial-based access only)
Pricing
TestLodge offers a 30-day free trial across four flat-rate pricing tiers:
Personal: $34 per month (up to 50 test plans, 200 test cases, and 100 test runs)
Basic: $69 per month (up to 150 test plans, 600 test cases, and 300 test runs)
Plus: $139 per month (up to 500 test plans, 3,000 test cases, and 1,000 test runs)
Premium: $279 per month (up to 1,500 test plans, 10,000 test cases, and 3,000 test runs)
Ideal for
TestLodge is more suited for:
QA teams looking for a streamlined, uncomplicated test tracking workspace
Budget-conscious companies wanting to add users without extra per-seat fees
Teams already using bug tracking/project management tools like Jira, Trello, or Linear
Projects requiring rapid deployment with minimal training required
Tuskr is a cloud-based test management platform that bridges the gap between manual testing and automated test results with a modern, intuitive interface. It stands out by offering strong features like generative AI for test case creation and automatic workload balancing without the bloated complexity of legacy enterprise tools. Tuskr provides unified dashboards that allow QA teams to monitor real-time analytics and track testing progress. While its functionality goes beyond basic test management, it offers multiple plans, including a free tier, for teams of all sizes and needs.
Key Features
Tuskr is most popularly known for the following features:
Unified test management: Centralizes manual test cases, automated results, and real-time visual dashboards in a single view.
AI-driven efficiency: Generates comprehensive test cases from requirements using generative AI and automatically balances tester workloads.
Visual dashboards: Rich, real-time analytics with full dark mode support for better visibility and tracking.
Seamless Integration: Connects easily with Jira, GitHub, Slack, and major CI/CD pipelines.
Pros
Some key advantages of Tuskr include:
Good for unifying manual and automated testing
Optimizes resource allocation among testers with AI-driven workload balancing.
Generative AI capabilities save planning time
WYSIWYG rich text editor with an intuitive and modern UI
Free plan for up to 5 users
Transparent pricing structure
Cons
Tuskr has its fair share of drawbacks, including:
Fewer native integrations than extensive enterprise suites
Advanced reporting can be limited for highly complex datasets
API access and advanced webhooks are restricted to paid tiers
Limited custom fields in all tiers
Pricing
Tuskr’s pricing model looks like:
Free Plan: Free for up to 5 users, 5 projects, and 1,000 test cases.
Team Plan: From ~$9 per user, per month for 50K test cases.
Business: From ~$15 per user, per month for 100K test cases.
Enterprise: From ~$29 per user, per month for 250K test cases.
Ideal for
Tuskr is ideal for:
Organizations looking for a cost-effective alternative to legacy tools.
Teams wanting to unify manual and automated test results.
QA processes that benefit from AI-assisted test case creation
6. Qase
Qase is a lightweight, cloud-based test management tool designed with simplicity and speed in mind. It offers an easy way to create, organize, and execute test cases without overwhelming users with complex workflows. Qase supports automation integration and API access, making it friendly for modern development pipelines. Collaboration features help teams link tests with issues and development work. The tool is particularly appealing to startups and small QA teams moving away from legacy tools. It strikes a good balance of affordability and usability, which makes it a popular entry-level test management solution.
Key Features
Key features of Qase include:
Modern UI: Qase flexes modern UI to facilitate intuitive test case management practices.
AIDEN: Comes with an AI Software testing agent for AI test conversion, generation, analysis, and execution.
Extensive integrations: Offers 35+ integrations for both manual and automated testing.
Customizable dashboards: Supports advanced data analytics with customizable, drag-and-drop widget-powered dashboards.
Pros
What makes Qase better is its:
Clean, user-friendly UI
Quick team onboarding
Affordable pricing; free tier available
Strong automation support
Versatile and customizable reporting and data analytics.
Cons
It has a few drawbacks, including:
Smaller ecosystem than enterprise suites
Analytics is not as deep as high-end or modern tools
Some CI/CD integrations need setup
Pricing
Qase has four pricing tiers:
Free($0/user/month): Supports up to 3 users with basic functions, ideal for students and hobbyists.
Startup ($24/user/month): Supports up to 20 users with limited automation and AI support and no customer support. Only provides 90 days of testing history.
Business ($30/user/month): Supports up to 100 users and offers role-based access control with 1 year of testing history.
Enterprise: For team more than 100 users, custom pricing is available with enterprise-level security, support, and customization.
Ideal for (teams, projects, etc.)
Qase is ideal for:
Small to large QA teams requiring basic testing functionality
Teams new to test management
Projects adopting automation early
Agile teams that want simplicity
7. TestDino
TestDino is a centralized test reporting and analytics platform designed for teams managing large volumes of automated and manual tests. It focuses on AI-powered failure analysis, flaky test detection, and deep visibility across branches, environments, CI workflows, and with Playwright MCP Support. TestDino is commonly adopted when teams struggle with noisy test failures, reruns, and poor root-cause visibility. Its reporting emphasizes actionable insights rather than raw pass/fail summaries. However, the platform has a bit of a learning curve, and it’s mainly optimized for Playwright-based automation, most useful for teams that already run tests in CI.
Key Features
Manual and automated test case management: Manage test documentation and automation together.
Flaky test detection: Identifies unstable tests over time instead of marking everything as "failed.”
CI-first optimization: Rerun only failed tests and reduce pipeline time and cost.
Evidence-rich failure views: Screenshots, videos, traces, logs, and steps all in one screen.
Pros
Flaky test detection and history make CI more stable and predictable.
CI-first workflows enable PR comments, reruns, and automation easily.
Role-based dashboards give each team member the right level of detail.
AI insights help teams debug faster by explaining real failure causes.
Reports show traces, screenshots, videos, logs, and steps together.
Cons
Optimized primarily for Playwright-based automation.
Useful for teams that already run tests in CI.
AI requires collecting test runs to get smarter over time.
Some teams may need a short walkthrough before they feel comfortable.
Price
TestDino has the following pricing plans:
Community: Free for single users using single projects with 5000 test executions/month.
Pro Plan: $49/month for up to 3 users and 3 projects with 25,000 test executions/month
Team Plan: $99 /month for up to 30 users and 5 projects with 75,000 test executions/month.
Enterprise: Custom pricing.
Ideal for
Teams that already run tests in CI.
Playwright-based automation processes.
8. BrowserStack Test Management
BrowserStack’s test management solution is designed to work closely with its broader testing ecosystem. It helps teams manage test cases, executions, and results alongside manual and automated testing. AI-assisted features support faster test creation and organization, and integrations with CI/CD tools and issue trackers make it easy to connect testing with development workflows. Teams already using BrowserStack for cross-browser or device testing benefit from having everything in one platform. It’s best suited for teams looking for an all-in-one cloud testing environment.
Key Features
BrowserStack’s highlights are:
AI agents: BrowserStack highlights AI test case creation and execution that enhance test coverage.
Advanced reporting and debugging: Offers AI-driven flaky test detection, unique error analysis, failure categorization, RCA, timeline debugging, and Custom Quality Gates.
Customizable dashboards: Supports customizable dashboards and smart reporting to gain insights into testing efforts across all projects.
Simple UI: Straightforward interface that supports bulk edit operations.
Pros
BrowserStack’s key value-propositions are:
Works seamlessly with the BrowserStack ecosystem
Free tier with generous limits
Strong AI automation support
Real-time results visibility
Good collaborative features for teams
Fast setup and onboarding with a clean, simple UI
Cons
BrowserStack is also heavily criticized for:
Paid plans still have some features “upcoming.” Users have no clear idea of the value for money.
Almost all advanced features, like AI, are limited to top-tier plans
Reporting options less customizable in basic versions
An extensive list of add-ons and user-based pricing tiers at each level can feel complex
Pricing
BrowserStack Test Management has 5 pricing tiers:
Team: $149/month/5 users with basic test management functions and features.
Team Pro: $249/month/5 users with slightly advanced features (some are still in progress)
Team Ultimate: AI agents are only available in this plan, which requires contacting sales to inquire about pricing.
Enterprise: Enterprise consists of add-ons that users need to pick and choose from, and contact sales to inquire about pricing.
Free: Solo-user version that offers limited access to test case management functions.
Ideal for
It’s best suited for:
Teams already using BrowserStack for testing
Organizations with growing teams and a larger budget
Automation-heavy QA workflows
Teams with extensive knowledge of QA add-ons and complex features
9. TestFLO
TestFLO is a Jira add-on that allows teams to manage test cases and executions inside Jira. It focuses on aligning testing activities closely with agile boards and workflows, and lets the team execute manual and automated tests without leaving the Jira interface. Reporting is also available directly within Jira dashboards, reducing context switching for teams already using Jira daily. It works well for agile teams that want simple, Jira-native test management.
Key Features
Key features of TestFLO include:
Native test planning and organization: A test repository that helps you manage tests within a clear structure in Jira.
Large-scale software testing: Teams with repetitive test execution can enable test automation in Jira via REST API and connect to the CI/CD pipeline to test in the DevOps cycle.
Comprehensive test coverage: Enables traceability links between requirements, test cases, and other Jira artifacts.
Pros
Its primary advantages are:
No need for a separate tool outside Jira
Easy Jira onboarding, less context switching
Traceability within Jira stories/tasks
Jira permissions extend to tests
Quick execution tracking
Extensive automation support
Low learning curve for Jira native users
Cons
This tool has some drawbacks, including:
Requires Jira setup; not a standalone product outside Jira
Not for small teams
Only sold as an annual subscription
Pricing
TestFLO is a “Data Center” Atlassian app and is only sold as an annual subscription with a 30-day free trial for each plan. The plans include:
Up to 50 users: $ 1,186 per year
Up to 100 users: $ 2,767 per year
Up to 250 users: $ 5,534 per year
Up to 500 users: $ 9,488 per year
Up to 750 users: $ 12,650 per year
Ideal for
TestFLO is ideal for:
Large-scale teams or enterprises
Organizations within the Atlassian ecosystem
Developers and QA in one Jira board
Teams with frequent and rapid feature releases
Cross-functional squads
10. QA Touch
QA Touch is a test management platform designed to improve productivity through automation-friendly and AI-assisted features. It helps teams create, manage, and execute test cases with minimal manual effort. Built-in dashboards provide real-time visibility into testing progress. QA Touch integrates with popular development and issue-tracking tools. Its interface is modern and easy to navigate for new users. The tool suits teams looking for efficiency and quick adoption.
Key Features
QATouch is known for its:
Effective test management: Offers efficient management of projects, releases, test cases, and issues in a centralized repository, along with various test suites, test plans, reports, custom fields, requirement mapping, an agile board, audio recording of issues, screen recording, version history, and more.
Built-in tools: Enable teams to log, track, and manage bugs seamlessly with a built-in bug tracking module, and share working hours with built-in timesheets.
Pros
Some key advantages:
Easy and quick onboarding
Built-in bug tracking (no separate system needed
Agile-friendly workflows
Useful dashboards for visibility, along with an agile board
Custom fields
Cons
Possible drawbacks:
Users find the UI design to be poor
Limited flexibility and customization options
Steep learning curve
The free version is extremely limited
No onboarding assistance in the starter plan
Pricing
QA Touch has three tiers:
Free: $0, limited to 3 projects, 100 test cases, and 10 test runs
Startup: $5 per user per month, limited to 100 projects, 10,000 test cases, export, and Jira Cloud
Professional: $7 per user per month, offering everything in Startup + automation, access to 10+ advanced integrations, and onboarding assistance.
Ideal for
It’s ideal for:
Small to mid QA teams
Startups testing early products
Teams seeking built-in defect tracking
Developers running lightweight QA cycles
Teams requiring integration with automation tools
11. TestMonitor
TestMonitor is a cloud-based test management tool focused on simplicity and transparency. It allows teams to manage test cases, runs, and milestones without complex configuration. Clear dashboards in TestMonitor help teams track progress and quality at a glance, and collaboration features make it easier to involve non-QA stakeholders. While it lacks some advanced enterprise features, it covers core testing needs well, making it a good fit for small, beginner teams.
Key Features
TestMonitor differentiates itself with the following features.
Comprehensive test management: Supports fast test case creation and efficient test case management, along with requirement management.
Expensive integrations: Seamlessly integrates with issue trackers and 30+ software testing frameworks for automated testing.
Reporting: Allows teams to track, view, and share test results from every angle with built-in reports.
Pros
Key benefits include:
Easy to use with a good interface
Extensive integrations
Easy test planning and organization
Built-in defect support
Good customer support and knowledge sharing
Cons
Some commonly observed drawbacks:
Lack of workflow management between users
Lack of customization in test cases
Tool-based terms require some learning
Limited roles within the tool
Pricing
TestMonitor has a 14-day free trial and three pricing tiers:
Starter: $13/user/month for up to 3 users with basic functions.
Professional: $20/user/month for 5, 10, 25, 50, or 100 users with advanced features.
Custom: Minimum for 10 users with enhanced customer support and onboarding features (with custom pricing).
Ideal for
It’s a better fit for:
Small to mid-sized QA teams
Teams needing straightforward test tracking
Teams tracking requirements as well as tests
Small teams moving past spreadsheets
12. Azure Test Plans
Azure Test Plans is Microsoft’s test management solution within Azure DevOps. It supports manual and exploratory testing with full traceability to work items. Teams can capture detailed test results, including screenshots and logs, to provide a comprehensive view of the test process. It has tight integration with Azure Boards and Pipelines, enabling direct connection between testing, development, and deployment. The tool works best for teams already using the Microsoft DevOps ecosystem, and it’s commonly used in enterprise and enterprise-leaning environments.
Key Features
Azure’s core features include:
Comprehensive test management: Offers manual and exploratory testing tools for efficient testing.
End-to-end traceability: Provides end-to-end traceability with Azure Boards
Captures rich data: Allows users to capture rich scenario data as they run tests to make discovered defects actionable.
Pros
Some good highlights include:
Deep integration with the Azure DevOps suite
End-to-end traceability
Strong reporting tied to work items
Seamless link to repos, pipelines, boards
Powerful exploratory testing features
Good for enterprise teams
Rich execution logs and test artifacts
Cons
Why users skip Azure:
Best value only inside Microsoft DevOps
Can feel complex for non-Azure users
UI learning curve for new testers
Pricing tied to Azure DevOps plans
Not ideal outside the DevOps stack
Limited plug-ins outside the Microsoft ecosystem
Pricing
Pricing for Azure Test Plans depends on the users’ selection of all or selected Azure DevOps services, user licenses, number of storage, and number of users. A basic setup can start somewhere around ~$52/user/month as part of the Azure DevOps add-on.
Ideal for
Azure is more suited for:
Teams that are fully invested in Azure DevOps
Microsoft stack enterprise teams
Agile and DevOps workflows
Projects needing traceability from code to tests
Large test suites with automated pipelines
Cross-department DevOps alignment
Cloud-centric organizations
13. QMetry
QMetry is a comprehensive test management platform for Jira, built for enterprise-scale testing, emphasizing traceability, compliance, and advanced analytics. It supports manual, automated, and exploratory testing with strong reporting capabilities. QMetry integrates with CI/CD tools and automation frameworks. It features custom workflows and permissions, supporting complex team structures, which is also why it’s well-suited for large organizations with strict QA governance needs.
Key Features
QMetry’s main highlights are:
Jira-native test authoring: Offers simplified test authoring, versioning, and management inside Jira by creating, linking, and tracking test cases easily.
Test execution: Records test executions smartly with test cycles, with which testers can execute test cases multiple times while preserving the execution details.
Comprehensive reporting: Features dashboards and cross-project reporting for analytics, test runs, and traceability.
Pros
Its key advantages include:
Robust integrations with CI/CD tools
Strong traceability support
Compliance and audit trails
Works well in complex environments
Broad toolchain integrations
Configurable dashboards
Scales well with QA maturity
Cons
Some of its possible drawbacks are:
UI appears complex to first-time users
Learning curve for advanced modules
Pricing is not publicly transparent
Setup/configuration overhead
Heavy for very small teams
Not ideal for lightweight projects
Pricing
QMetry does not have transparent pricing. Users get a 14-day trial after submitting their information to sales and get a custom quote.
Ideal for
QMetry is ideal for:
Large QA teams
Enterprise organizations
DevOps with formal governance
Regulated industries (e.g., healthcare, finance)
Teams with complex testing requirements
14.PractiTest
PractiTest is an end-to-end, centralized test management platform built for teams that need real visibility and control over their QA process. Instead of treating testing as an independent task, PractiTest connects requirements, test cases, executions, and defects in a single traceable workflow, giving both technical and non-technical stakeholders a clear picture of quality at any stage. Its customizable dashboards and advanced filters help you cut through noise to spot trends, risks, and coverage gaps without digging through spreadsheets. PractiTest is popular with mid-sized to large teams and regulated environments where audit trails and visibility matter.
Key Features
PractiTest boasts:
AI-driven capabilities: Helps teams optimize QA operations by streamlining time-consuming tasks, such as reusing test cases, with AI.
Real-time visibility: Offers customized, multi-dimensional filtering, allowing teams gain visibility for making strategic, data-driven decisions throughout planning and execution.
Advanced core architecture: Features a good foundational architecture and data management capabilities, helping teams generate quick reports, manage repositories, organize executions, and track milestones.
Pros
What makes it truly unique:
User-friendly interface
Versatile organization of test cases
Seamless integration with automation tools
Ease of test management
Prompt customer support
Offers 5 commenting users per license
Cons
Why some users skip PractiTest:
Filtering issues that hinder navigation
Difficult learning curve, especially for new users
Slow loading times and a non-intuitive interface impact workflow
Pricing
PractiTest has two pricing tiers:
Team: $54/user/month for a minimum of 5 users and up to 100, comes with a free trial.
Corporate: For a minimum of 10 users, requires contacting sales for a custom quote.
Ideal for
PractiTest is ideally suited for:
Scaling QA teams
Organizations with a higher QA budget
Teams looking for an advanced QA architecture
Teams that want full control over a test management tool with licensing
Best Test Management Tools: Comparison Table
Here’s a comprehensive overview of all test management tools in the list:
Tool
Key Highlights
Automation Support
Team Size
Pricing
Ideal For
TestFiesta
Flexible workflows, tags, custom fields, and AI copilot
Yes (integrations + API)
Small → Large
Free solo; $10/active user/mo
Flexible QA teams, budget‑friendly
TestRail
Structured test plans, strong analytics
Yes (wide integrations)
Mid → Large
~$40–$74/user/mo)
Medium/large QA teams
Xray
Jira‑native, manual/ automated/ BDD
Yes (CI/CD + Jira)
Small → Large
Starts ~$10/mo for 10 Jira users
Jira‑centric QA teams
Zephyr
Jira test execution & tracking
Yes
Small → Large
~$10/user/mo (Squad)
Agile Jira teams
qTest
Enterprise analytics, traceability
Yes (40+ integrations)
Mid → Large
Custom pricing
Large/distributed QA
Qase
Clean UI, automation integrations
Yes
Small → Mid
Free up to 3 users; ~$24/user/mo
Small–mid QA teams
TestMo
Unified manual + automated tests
Yes
Small → Mid
~$99/mo for 10 users
Agile cross‑functional QA
BrowserStack Test Management
AI test generation + reporting
Yes
Small → Enterprise
Free tier; starts ~$149/mo/5 users
Teams with automation + real device testing
TestFLO
Jira add‑on test planning
Yes (via Jira)
Mid → Large
Annual subscription starts at $1,100
Jira & enterprise teams
QA Touch
Built‑in bug tracking
Yes
Small → Mid
~$5–$7/user/mo
Budget-conscious teams
TestMonitor
Simple test/run management
Yes
Small → Mid
~$13–$20/user/mo
Basic QA teams
Azure Test Plans
Manual & exploratory testing
Yes (Azure DevOps)
Mid → Large
Depends on the Azure DevOps plan
Microsoft ecosystem teams
QMetry
Advanced traceability & compliance
Yes
Mid → Large
Not transparent (quote)
Large regulated QA
PractiTest
End‑to‑end traceability + dashboards
Yes
Mid → Large
~$54+/user/mo
Visibility & control focused QA
Cost Breakdown of Test Management Tools
Cost is always a big decider of things, so here’s a breakdown to help you make an informed decision.
Tool
Pricing
TestFiesta
Free user accounts available; $10 per active user per month for teams
TestRail
Professional: $40 per seat per month
Enterprise: $76 per seat per month (billed annually)
Xray
Free trial; Standard: $10 per month for the first 10 users (price increases after 10 users)
Advanced: $12 per month for the first 10 users (price increases after 10 users)
Zephyr
Free trial; Standard: ~$10 per month for first 10 users (price increases after 10 users)
Advanced: ~$15 per month for the first 10 users (price increases after 10 users)
Annual subscription (specific amounts per user band), e.g., Up to 50 users: $1,186/yr; Up to 100 users: $2,767/yr; etc.
QA Touch
Free: $0 (very limited)
Startup: $5/user/month
Professional: $7/user/month
TestMonitor
Starter: $13/user/month
Professional: $20/user/month
Custom: custom pricing
Azure Test Plans
Pricing tied to Azure DevOps services (no specific rate given)
QMetry
14‑day free trial; custom quote pricing
PractiTest
Team: $54/user/month (minimum 5 users)
Corporate: custom pricing
How to Choose the Right Test Management Tool for Your Team
Choosing the right test management tool isn’t just about the list of features; it’s about how well those features fit into your needs. The best tool for your team depends on how you work and where you’re headed in the near future; you want a tool that can grow with you. Below are the key factors to consider when evaluating options, with actionable questions to help you decide.
Team Size
Your team size directly impacts your choice of a test management tool.
Small teams (1–10): Lightweight, affordable tools with minimal setup work best. Tools like TestFiesta, Qase, and QA Touch let you get up and running quickly without complex configuration.
Mid‑sized teams (10–50): Mid-sized teams want a balance between rich features and cost-effectiveness, so they get more options, including TestFiesta, TestRail, Xray, Zephyr, and qTest.
Large teams (50+): Enterprise‑grade platforms such as TestFiesta (which keeps the pricing per user stable regardless of how big your team gets), qTest, QMetry, or PractiTest provide governance, traceability, and reporting at scale.
Distributed or cross‑functional teams: Prioritize tools with strong collaboration features and clear permissions so everyone stays in sync. Some options are TestFiesta, Azure Test Plans, and BrowserStack Test Management.
Budget
Whether you’re a small team or a large enterprise, cost is a significant factor to consider.
Tight budget: If you’re on a tight budget, tools like TestFiesta, QA Touch, Qase, TestMonitor, Zephyr (Standard), and Xray (Standard) should be in your shortlist.
Moderate budget: Tools like TestFiesta and TestMo balance features with cost-effective pricing.
Higher budget: Enterprise platforms (TestRail, qTest, QMetry) provide richer analytics and governance, but can be significantly more expensive, that too with their fair share of drawbacks.
Total cost of ownership: Factor in training, admin time, hosting (if not SaaS), and integrations, not just the license fee. Simpler SaaS tools like TestFiesta often have more to offer at less cost.
AI Support
AI capabilities are becoming a leading differentiator between tools, especially for agile QA teams that want to escape repetitive workflows and prioritize speed and efficiency.
AI‑assisted test creation: Tools with AI can auto‑generate test cases or suggest improvements based on patterns; TestFiesta and qTest are good examples.
AI analytics: Helpful for spotting coverage gaps or flaky tests without manual digging.
AI in automation: Some tools leverage AI to analyze automation health or map failures to potential root causes.
Keep in mind: AI isn’t essential. If you’re a manual-driven QA team, you can skip paying extra for AI, but if you’re scaling automation and want to reduce manual overhead, it’s a nice-to-have.
Testing Methodology (Manual vs. Automated)
Your testing approach should shape your choice.
Manual‑heavy teams: Tools with strong manual planning and execution workflows, clear test descriptions, and step‑reuse are best (TestFiesta, TestRail, and Zephyr)
Automation‑first teams: Look for platforms that capture, organize, and report automation results natively or via smooth CI/CD integrations (Xray, qTest, and BrowserStack Test Management).
Hybrid workflows: If you juggle both, choose platforms that unify manual execution and automated reporting in one place, such as TestFiesta, a manual test management tool that offers custom automation integrations.
Scalability
Scalability means both technical performance and process adaptability.
Technical scale: Ask yourself, can your tool handle large repositories of tests without slowing down? Do the latest releases and upgrades come with bugs or offer more ease of use?
Process scale: Does it support complex workflows, permissions, and reporting across multiple teams or products?
Governance: Larger orgs may need audit trails, role‑based access, and compliance reporting.
Cross‑project analytics: Can you view testing health across all products and teams in one dashboard?
Which Test Management Tool Is Best
Ultimately, the decision is solely in your hands. Many tools offer over-the-top features with advanced AI agents and extensive automations, but not all teams need that, so they pay extra for features they may not even use.
Tools that are simpler, flexible, intuitive, and actually solve ground-level QA issues are often more cost-effective and get work done faster. That’s because they do not offer complex pricing tiers, a huge list of add-ons, and a never-ending directory of features to confuse teams.
It’s always a good idea to prioritize tools that offer a free basic version or a free personal account so that you can try and test each capability before you decide to bring in your team.
TestFiesta promises true flexibility and intuitiveness, and also provides a free personal account at $0 forever for solo users. Sign up, get access to all features, conduct as many tests as you like, and if you’re convinced it’s the tool for you, you can bring in your team for a flat rate of $10/user/month; no complex tiers, add-ons, or custom quotes, only simplified, straightforward test management.
Conclusion
Choosing the right test management tool starts with aligning the tool with your team’s actual needs. Consider your team size, budget, testing methodology, integration requirements, and growth plans before making a decision.
The ideal tool should streamline your workflows, provide visibility into quality, and scale with your organization, not become a source of friction. Whether you’re a small startup looking for a lightweight, affordable solution or a large enterprise seeking full traceability and governance, there’s a test management tool that fits your requirements.
Investing the time to select the right platform now will pay off in faster testing cycles, better collaboration, and more confident releases down the line. To learn more about the right tool fit for your testing needs, book a demo today.
FAQs
What are test management tools?
Test management tools are software platforms that help QA teams plan, organize, execute, and track test cases for software testing. They centralize test cases, manage test execution, link defects, and provide reporting and traceability. These tools support manual and automated testing, improve collaboration, ensure coverage, and help teams maintain quality standards throughout the software development lifecycle.
What are the main benefits of a test management tool?
Primary benefits of a test management tool are its centralized test cases, streamlined execution, and defect tracking, which improve efficiency and collaboration. Test management tools provide traceability between requirements, tests, and bugs, enhancing reporting and visibility, which helps teams scale testing processes, all while maintaining organization and accountability across projects.
Is Jira a test management tool?
No, Jira is not a test management tool by itself. Jira is primarily a project management and issue-tracking platform used to manage tasks, bugs, and workflows. However, many teams use test management add-ons or plugins within Jira, like Xray and Zephyr, to manage test cases, test runs, and QA processes directly inside Jira. While Jira can host test management through extensions, it does not provide native test case management features out of the box. Many modern tools, like TestFiesta, can integrate with Jira for issue tracking.
Are test management tools scalable for teams of different sizes?
Yes, test management tools are generally scalable, but suitability varies by team size. Flexible tools like TestFiesta work well for all sizes of teams, because they provide scalability and can grow with your team. As your team expands or you get more test cases, a good tool supports your needs with workflow complexity and collaboration features.
What features should I look for when choosing a test management tool?
When choosing a test management tool, look for features that match your team’s workflow, size, and goals. Key aspects include flexible test case organization with folders, tags, and custom fields, strong automation integrations with CI/CD pipelines and issue trackers, and robust reporting and analytics for tracking coverage, progress, and trends. Collaboration capabilities, such as multi-user workflows and role-based access, are essential for team efficiency. Additionally, consider tools that allow easy migration from existing platforms, support exploratory testing and shared steps to reduce duplication, and offer clear pricing and scalability. Reliable customer support and onboarding resources can further ensure smooth adoption and long-term success.
What are free test management tools?
Free test management tools include TestFiesta (free solo accounts with full features), Qase (free tier up to only 3 users), BrowserStack Test Management (free plan available with basic functions), and QA Touch (limited free version). Other tools typically offer free trials but not fully free ongoing plans.
What is the average cost of a test management tool?
The average cost of a paid test management tool typically falls in the range of $10 to $40 per user per month for small‑to‑mid teams, with enterprise tools costing significantly more than the average. TestFiesta has a flat-rate pricing of $10/user/month for all features; no complex tiers or add-on plans.
How can I choose the right test management tool for my team?
To choose the right test management tool for your team, start by identifying your needs: team size, workflow complexity, automation requirements, and budget. Prioritize tools that offer good test organization (tags, custom fields), automation integrations, and solid reporting. Consider scalability and pricing transparency, plus whether you need Jira or DevOps ecosystem support. Finally, try free plans or trials to see which tool fits your workflow best before committing.











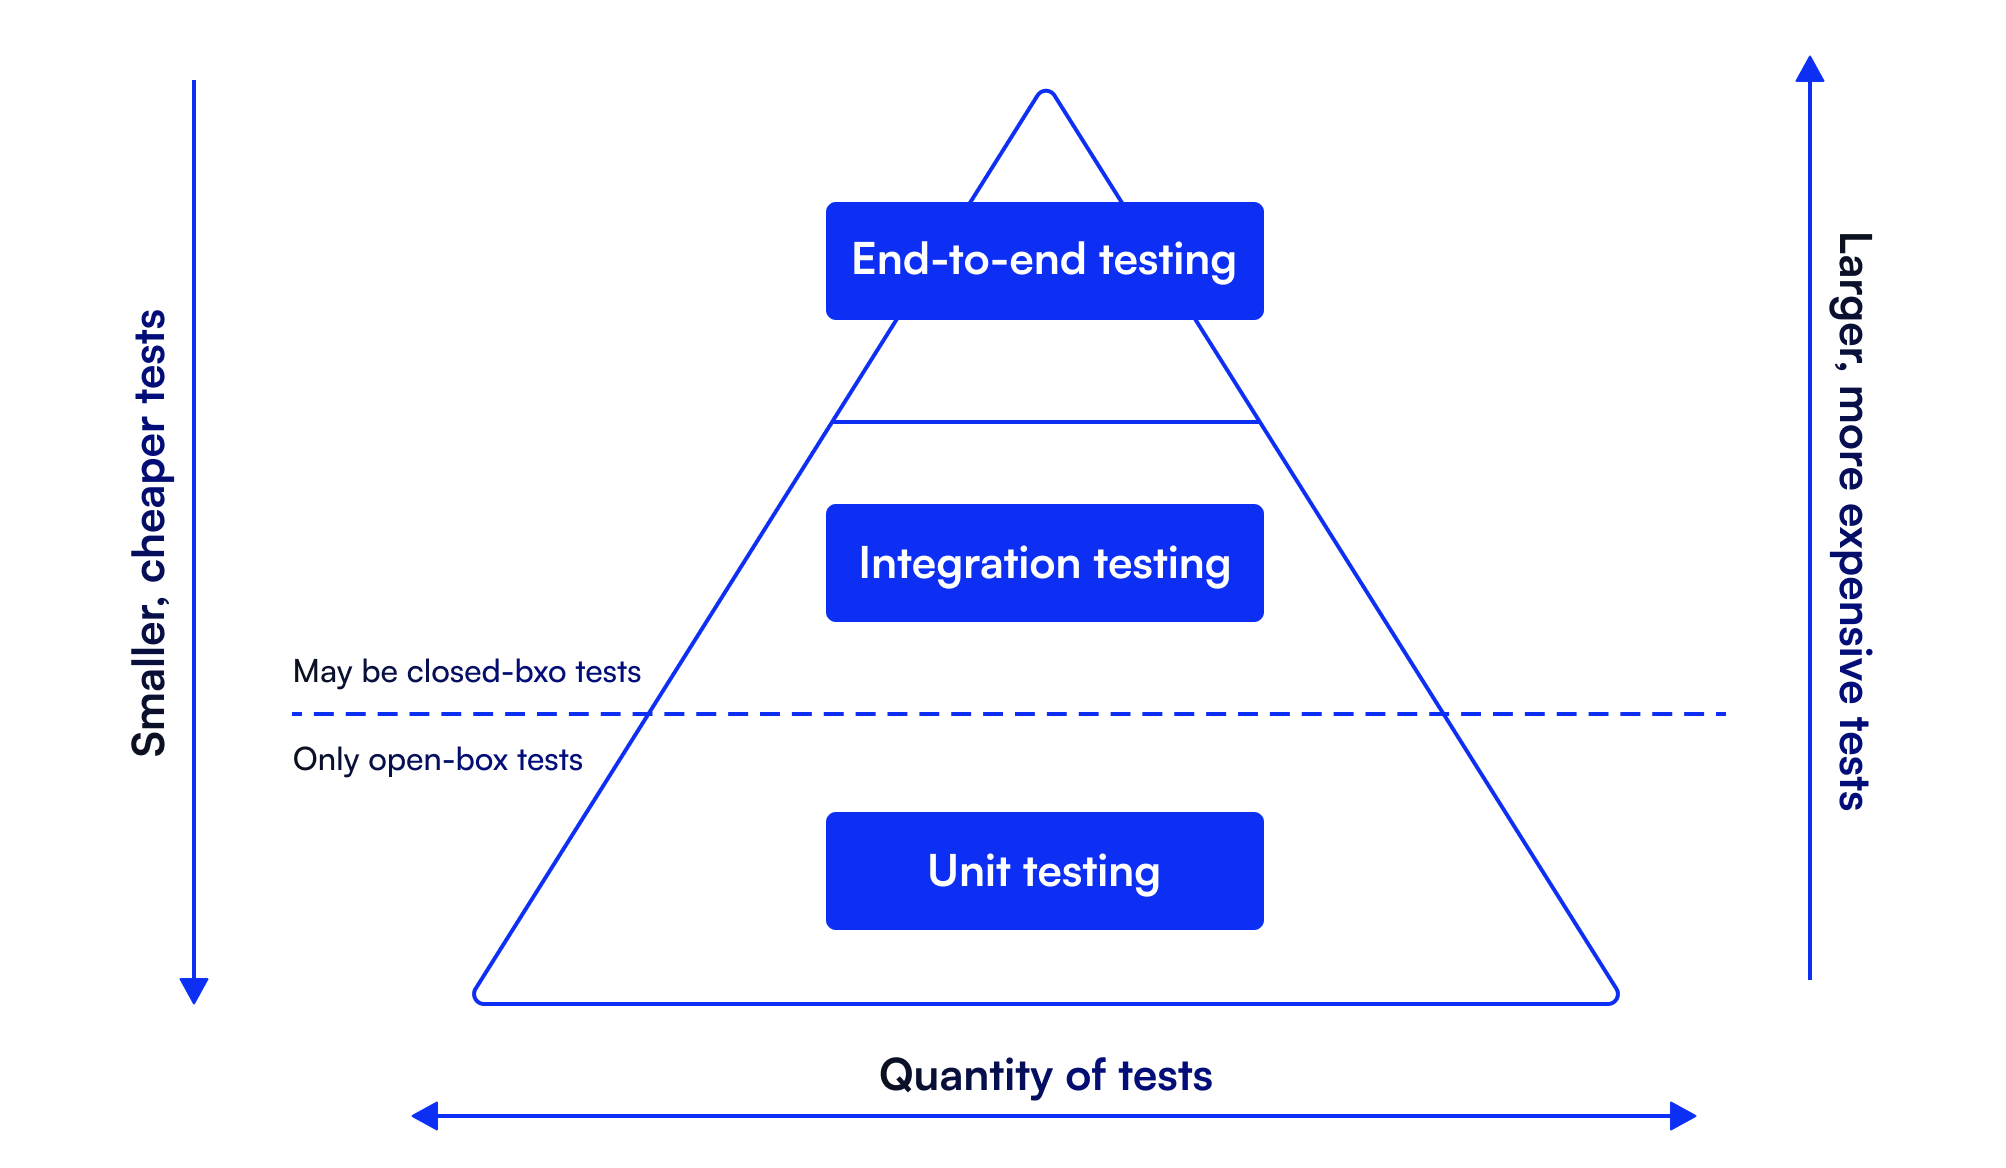


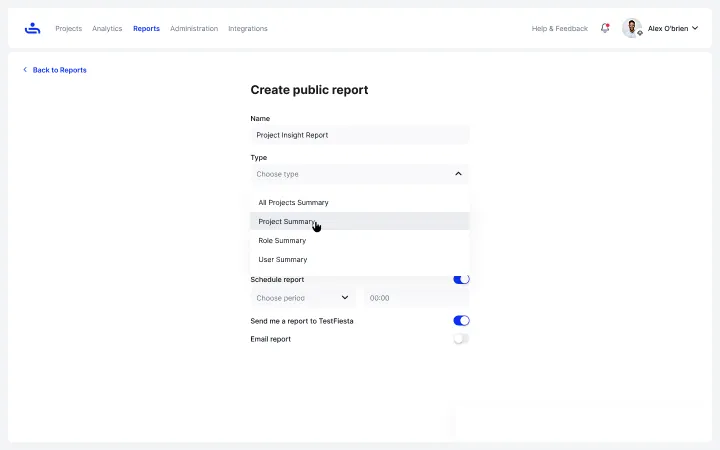
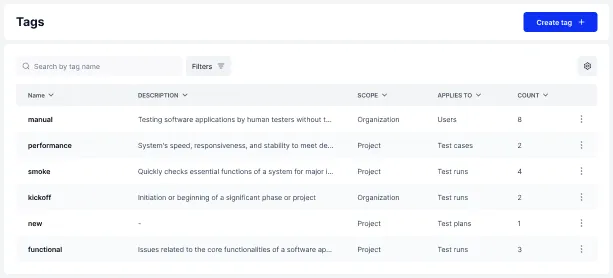
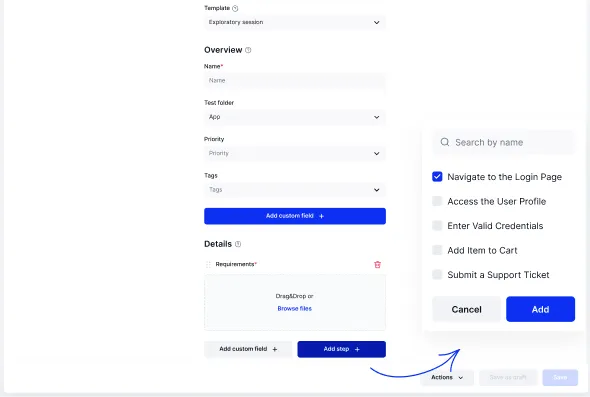
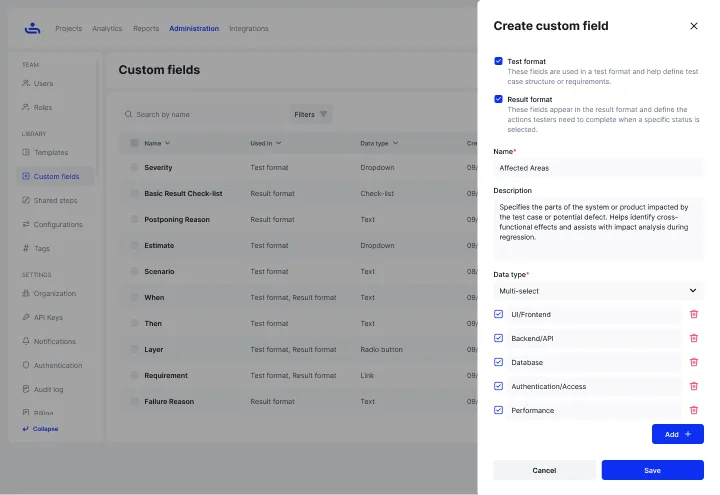
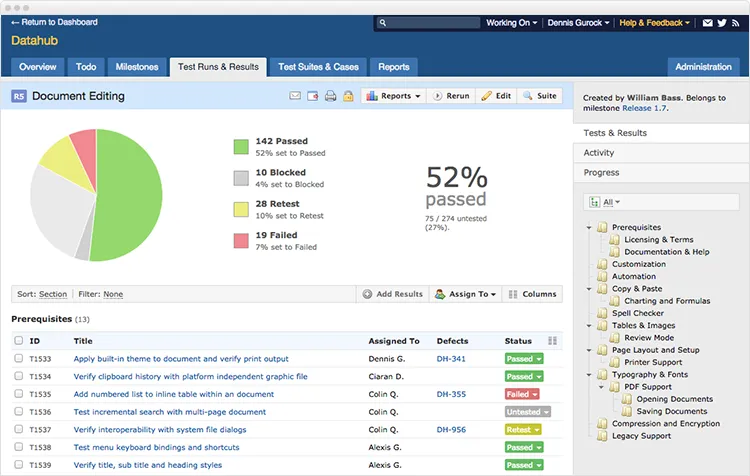
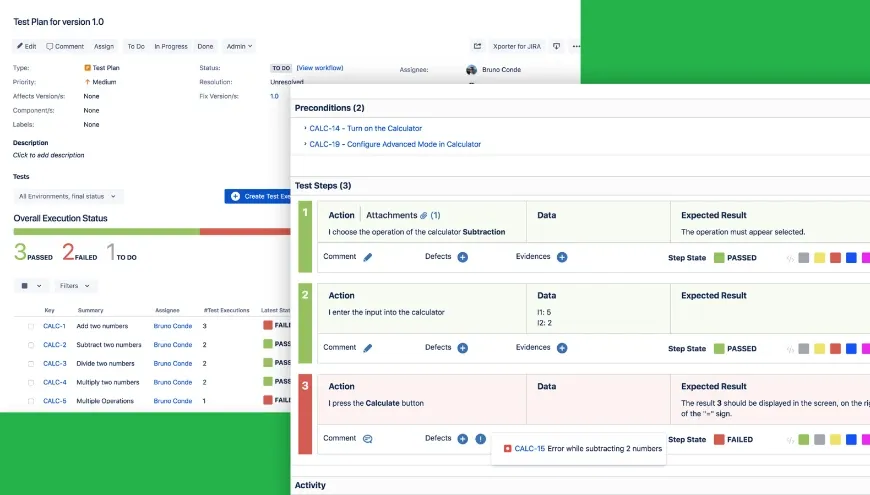
.png)